
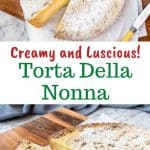
Torta Della Nonna
Torta della Nonna is a simple, rustic Italian dessert that is loved throughout Italy!
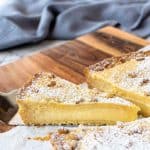
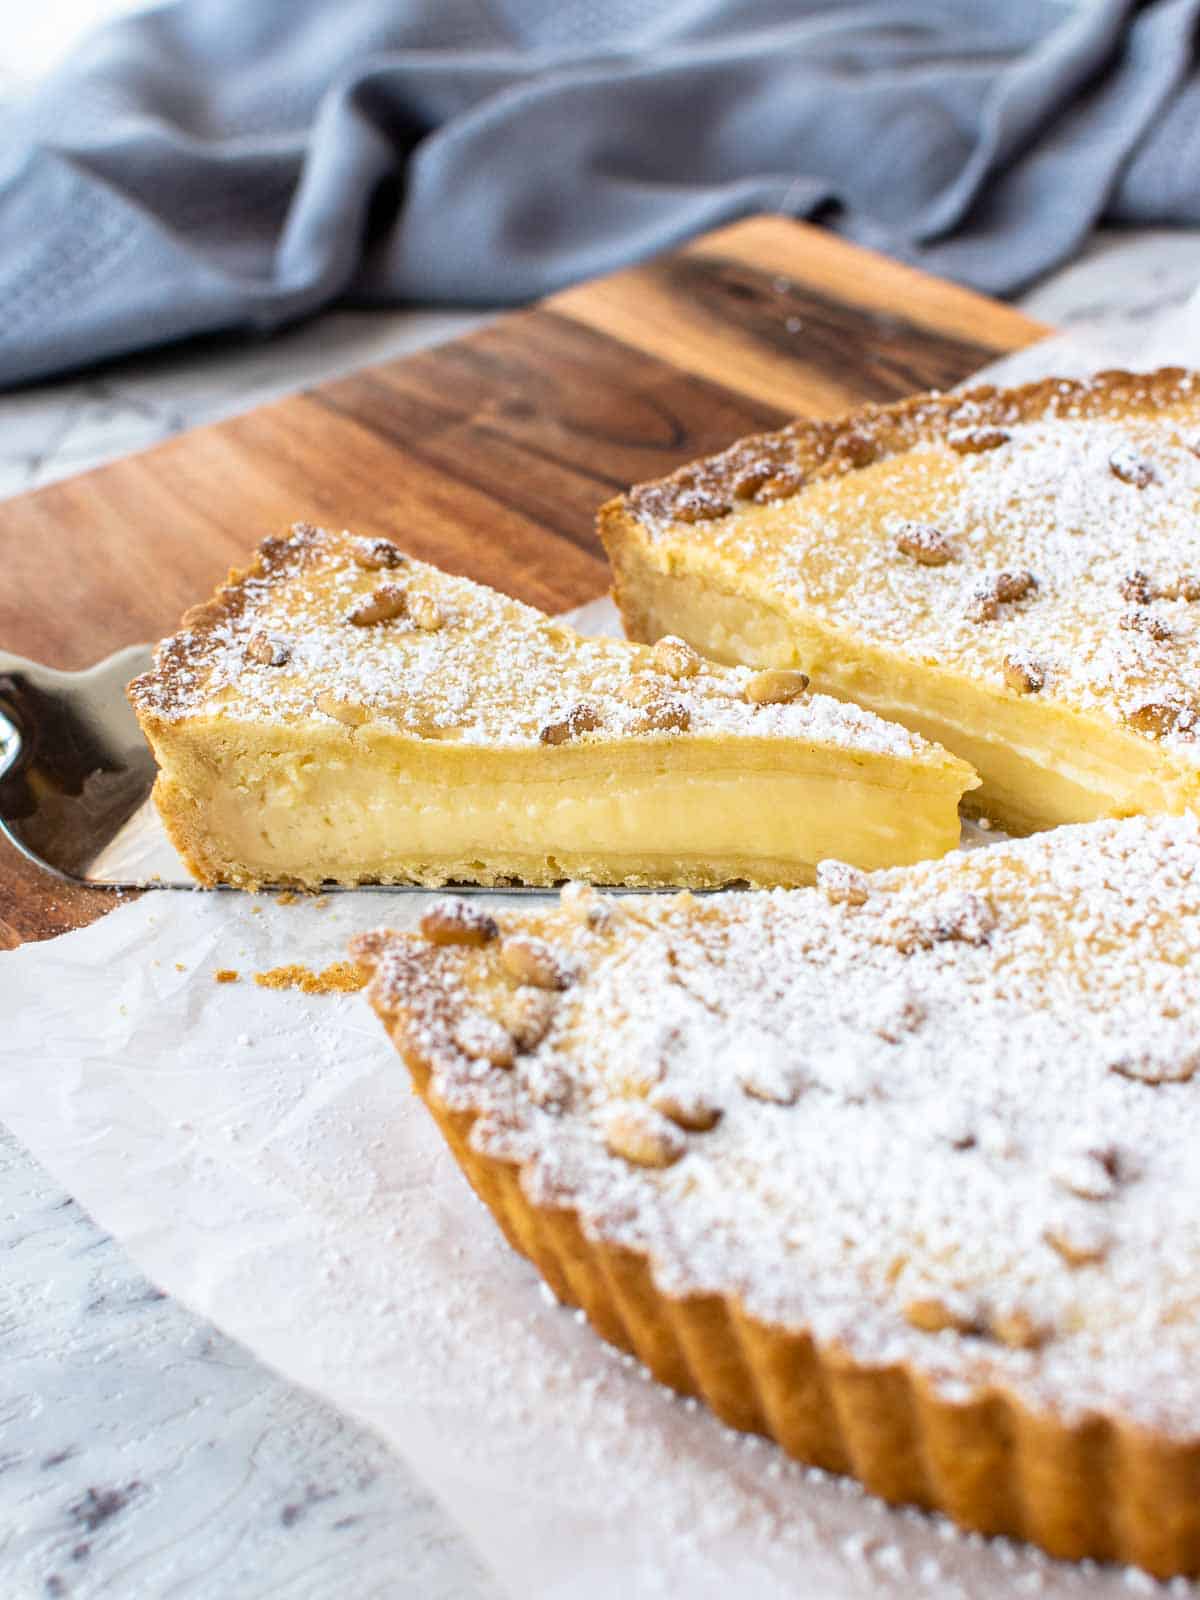
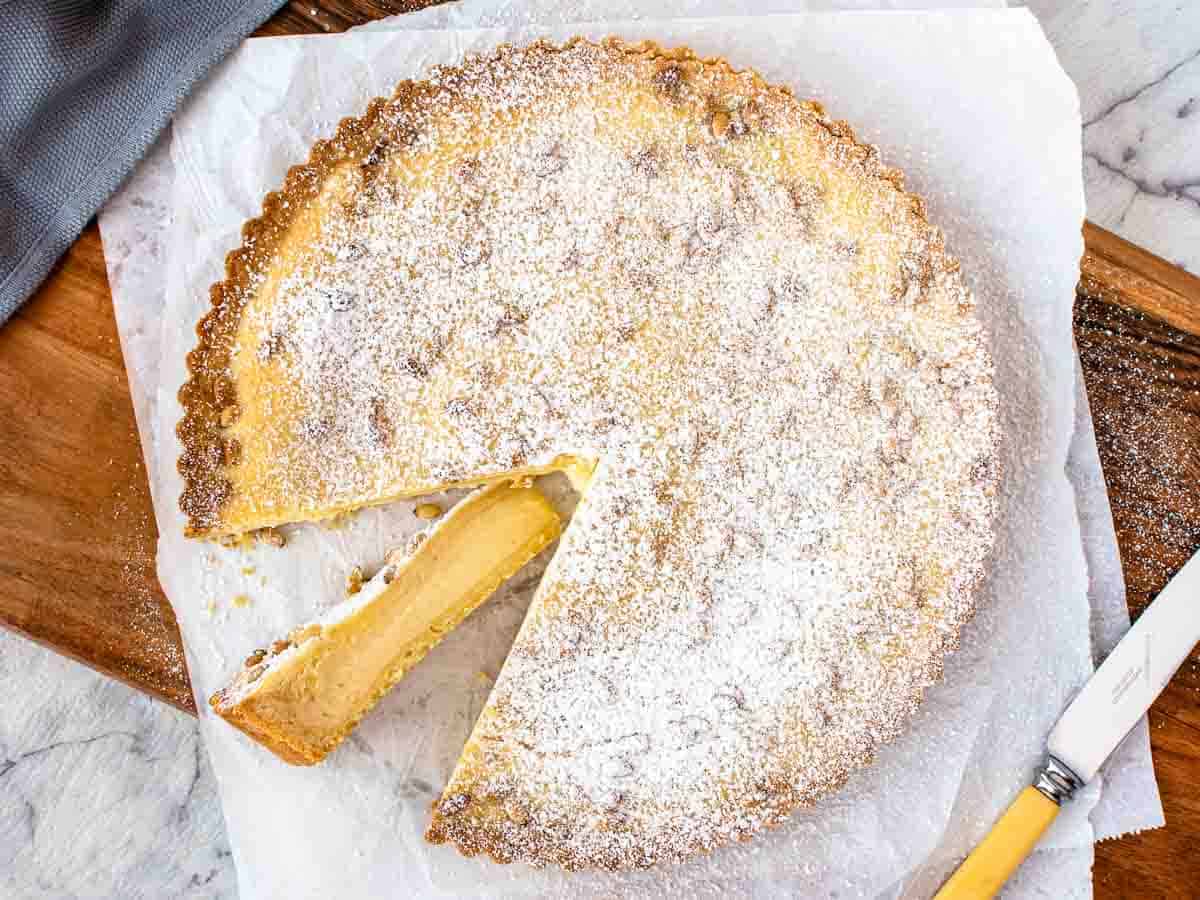
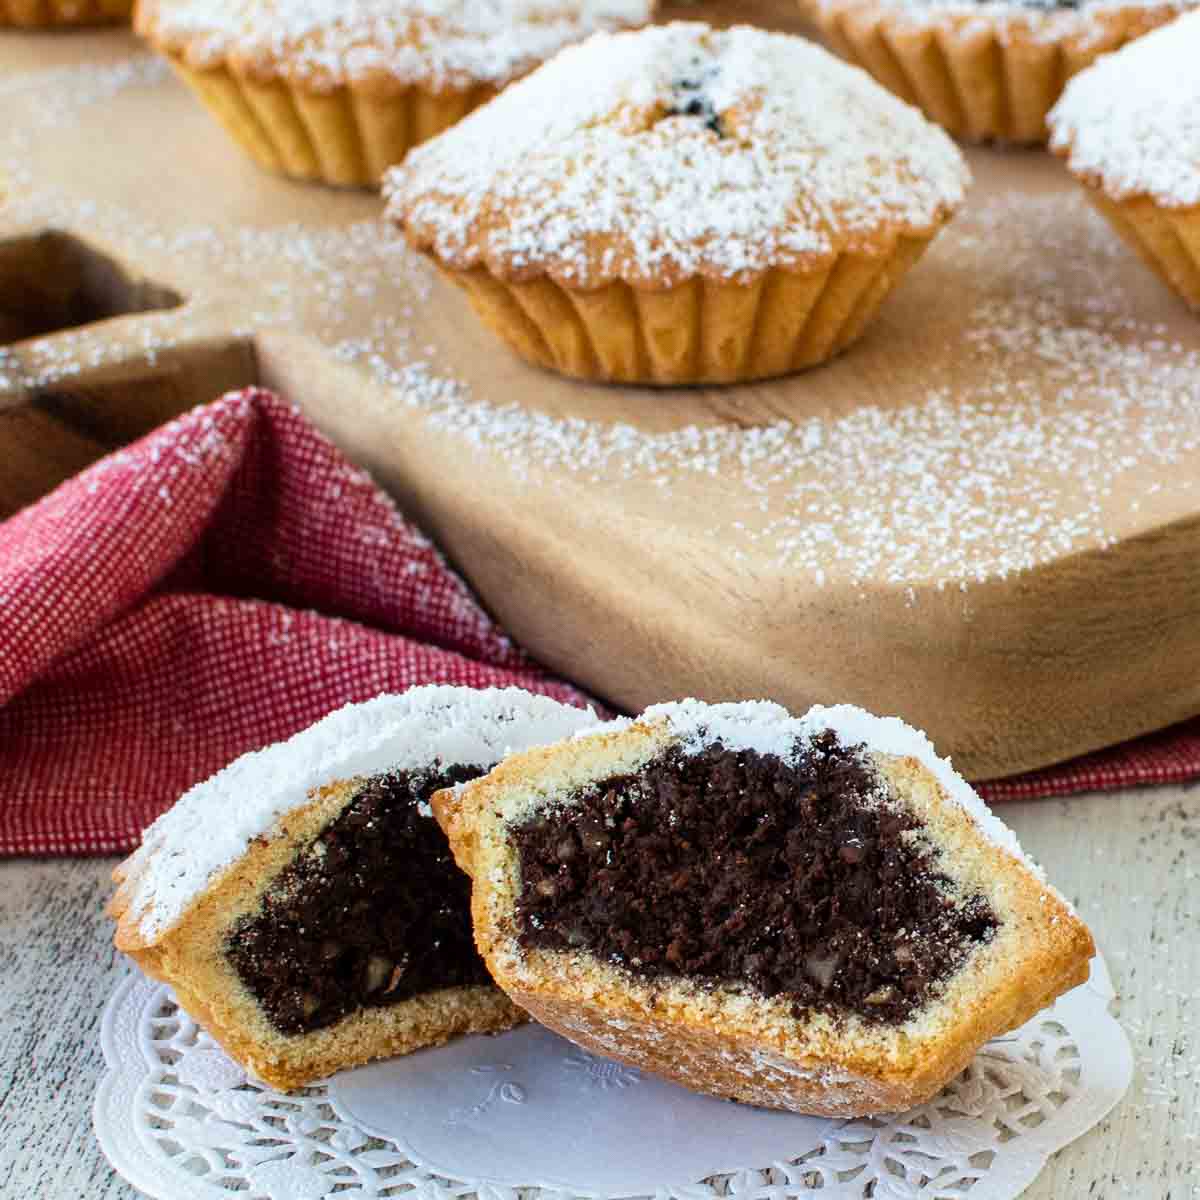
This classic tart consists of a lemony, tender shortcrust filled with luscious Italian pastry cream and is an absolutely ideal way to end any meal!!
This updated post was first published here on December 12, 2016.
Why you’ll love this recipe
Torta della Nonna literally translates to “grandmother’s cake” and conjures up visions of a cute, smiling nonna pottering away in her kitchen making her special cake for grandchildren. However, this Italian custard pie was actually first created in a restaurant kitchen and went on to become wildly popular!
I can totally understand why this torta is enjoyed so much. The shortcrust pastry is amazing – lightly crisp and supremely tender with a hint of lemon.
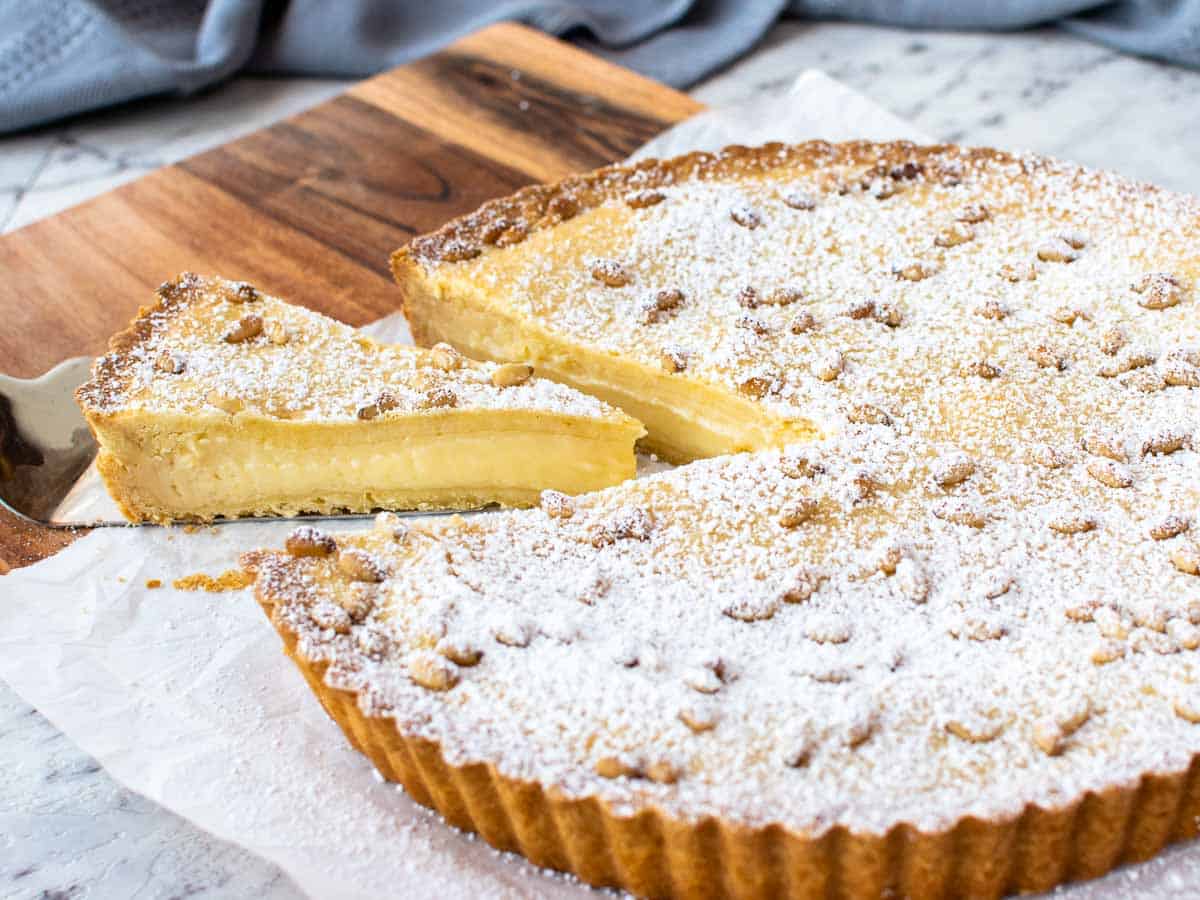
But the star of the show is definitely the filling. Rich, smooth and creamy with glorious ooze thanks to the generous use of egg yolks and whole milk. A lot like vanilla custard or pudding but so much better!!
Just like biscotti, chocolate budino or panna cotta, Torta della Nonna uses good, basic ingredients that you’ll find in most kitchens. Nothing fancy. The pleasure is all in the eating.
Using a food processor means the shortcrust pastry is a breeze to make but you’ll also find instructions for making it by hand. Plus, I’ll give you all my tips for making the perfect Italian pastry cream filling.
Whether you’re serving tagliatelle with garlic butter sauce or Italian chicken cutlets, finishing with this Italian custard tart will complete the meal perfectly!! Your guests will be begging for the recipe!
For complete ingredient quantities and full instructions, please scroll to the printable recipe card at the bottom of the page.
Ingredients
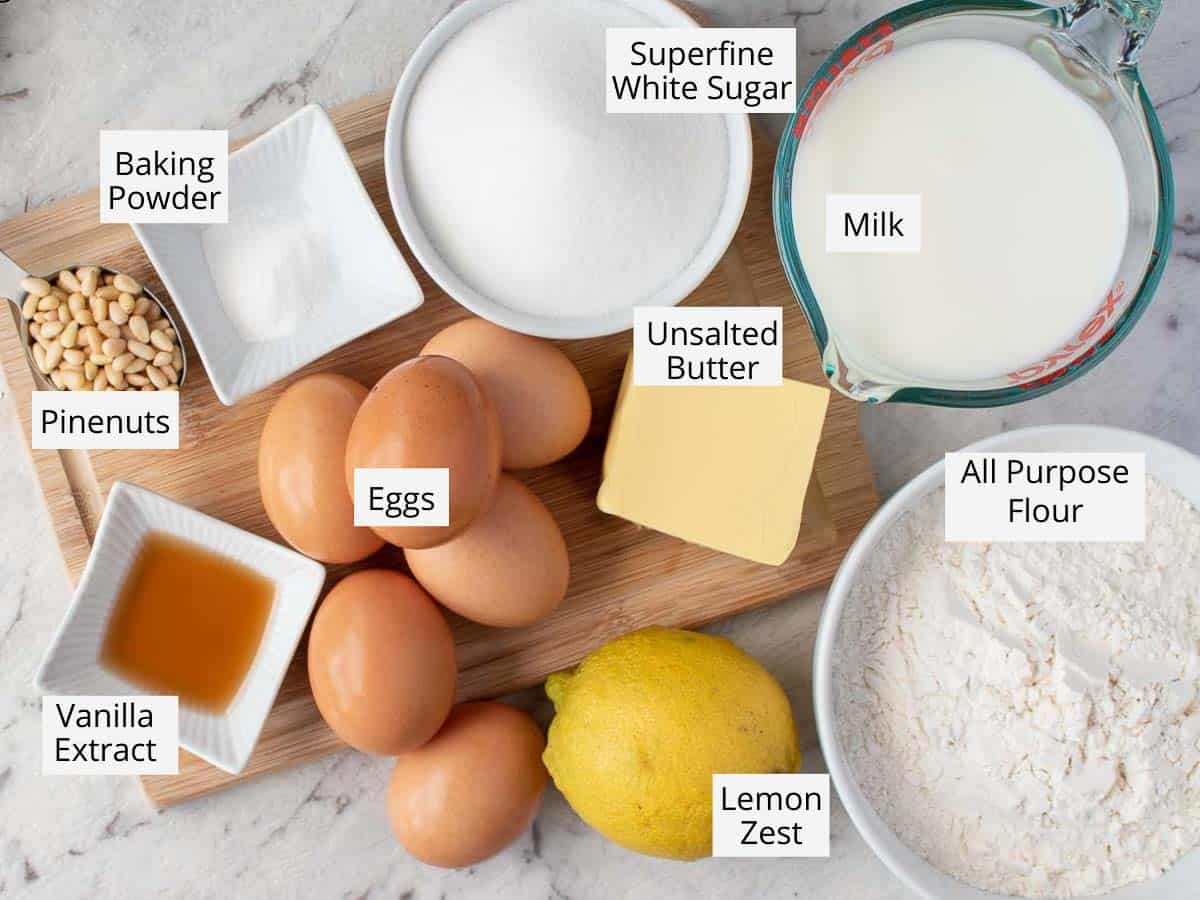
- Milk – Whole, full fat milk is my preferred choice here. You could substitute low fat or non dairy milk but you won’t achieve that creamy, richness that whole milk provides. So for the best results, please follow my suggestion. For extra richness, substitute ½ cup of milk for cream.
- Vanilla Extract – I like extract because it’s easy, no fuss and gives good flavor. Use real vanilla extract, not an imitation. If you prefer, split a vanilla bean and scrape the seeds into the milk instead.
- Egg Yolks – Just the yolks are needed for this recipe and you’ll use them in both the filling and the crust. Why not make my delicious egg white frittata, pavlova or raspberry torte with the leftovers?
- Sugar – Again, sugar is used in both filling and crust. I much prefer white, superfine (castor) sugar because it dissolves so easily and doesn’t leave any grittiness. However if you only have regular white sugar, you can use that.
- Flour – Here’s another ingredient that’s used in both filling and crust. Regular all purpose flour is what you need here. Just a little in the filling thickens the pastry cream. Measure carefully because too little will make it runny and too much…the opposite.
- Butter – Unsalted butter is best. If you only have salted butter, leave out the little bit of salt mentioned in the recipe card.
- Lemon Zest – Very finely grated zest creates a light, lemony flavor in the crust.
- Baking Powder – This recipe needs just a tiny bit of leavening.
- Salt – Brings out the flavor in sweet recipes as well as savory.
- Pine Nuts – The traditional embellishment for this Torta della Nonna has always been pine nuts. I know they’re expensive but you’ll just need a tablespoon. Seal the remaining nuts and store in the freezer if you don’t use them a lot.
Variations
My Torta della Nonna recipe is the classic version but sometimes I like to shake things up a bit with these variations.
- Before spooning in the pastry cream, spread a few tablespoons of Nutella (or another chocolate spread) over the base.
- Stir some mini chocolate chips through the cooled pastry cream then proceed as in the recipe.
- Divide the hot pastry cream in half and stir ¼ cup of chocolate chips into one half until melted.
Instructions
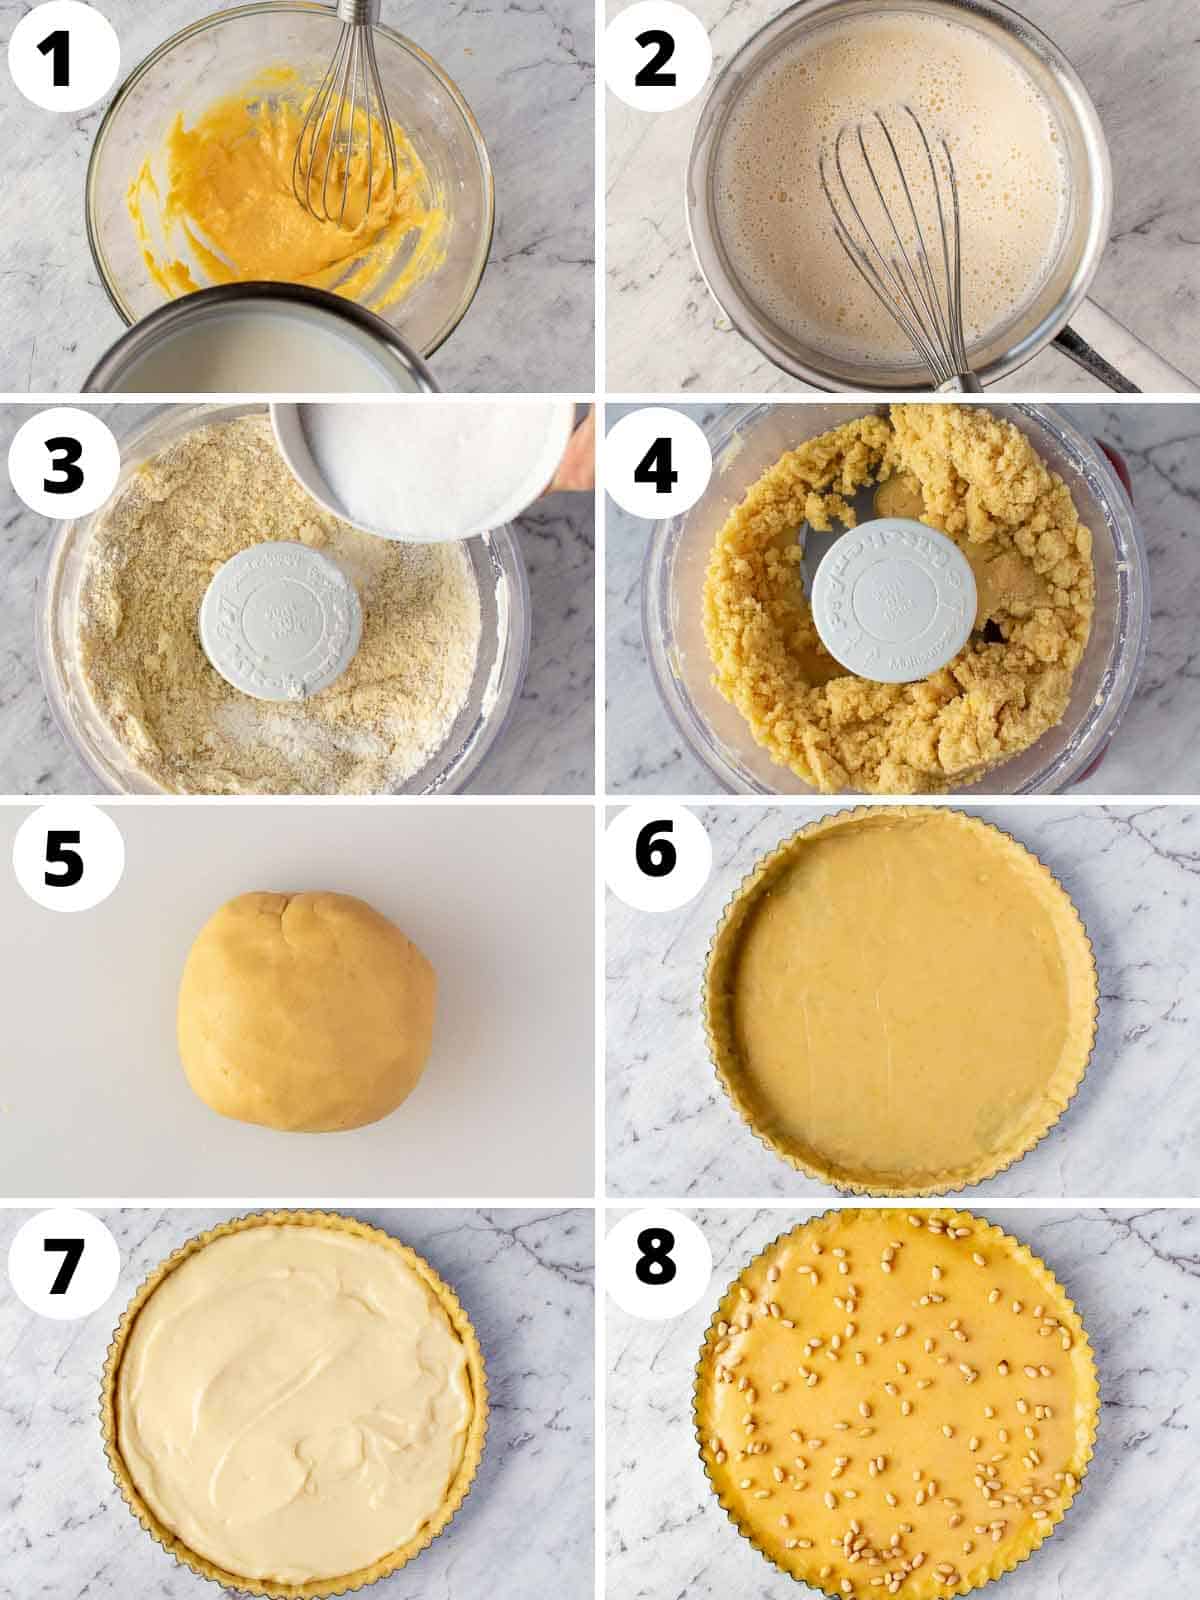
Please note that the numbered instructions below correlate to the numbered photo collage above. Scroll down to the recipe card for more detailed instructions.
Preheat the oven to 350ºF/180ºC and grease a 10 inch/25cm tart pan with a removable base.
- First place the milk and vanilla extract in a medium saucepan over low heat to warm. In a separate bowl, whisk together egg yolks and sugar then the flour. Gradually whisk in the warm milk.
- Strain the milk mixture back into the saucepan and bring to a simmer over medium heat to thicken. Set aside to cool completely.
- In a food processor, pulse the flour, lemon zest, baking powder, salt and butter.
- Then add egg yolks and process until a dough forms.
- Wrap dough in plastic and refrigerate for an hour.
- Roll out half of the dough and line the prepared pan.
- Fill with cooled Italian pastry cream.
- Roll out remaining dough and use it to cover the filling. Sprinkle with pine nuts and bake as instructed in the recipe card.
If you don’t have a food processor, check out the FAQ’s.
Tips for Success and FAQs
When preparing the pastry cream it’s important to add the warm milk slowly to the egg mixture – whisking well. This tempers the eggs and prevents curdling. Then be sure to allow the filling to bubble for a full minute to cook the starch in the flour and avoid a floury taste.
Pastry has become known as being difficult but this one works every time if you follow all my tips. Dough doesn’t like to be kneaded like bread so be gently and don’t overwork the dough. Also I find it easier to keep the dough thoroughly chilled when rolling out otherwise it will stick and be hard to handle.
Finally, soak the pine nuts in water for around 5 minutes to stop them burning in the hot oven. If the top gets too dark, cover with a sheet of foil and finish cooking.
Both the pastry and the filling can be made the day before and stored in the fridge. Be sure to remove the dough from the fridge 15 minutes before you want to roll it out otherwise it may be too hard.
If you don’t have a food processor, rub the butter pieces into the flour, lemon zest, baking powder and salt with your fingertips until the mixture resembles breadcrumbs. Stir in the sugar then egg yolks and combine gently until a dough is formed.
No, the filling is not too wet so blind baking is unnecessary.
Once baked, store Torta della Nonna in the fridge for 4-5 days on a covered plate.
No, I don’t recommend freezing. The pastry cream will separate and lose all of its creaminess.
Serving Suggestions
Traditionally, Torta della Nonna is served for dessert followed by an espresso. It doesn’t need anything but a dusting of powdered sugar.
However, a spoonful of raspberry or blueberry compote wouldn’t go astray. Or go over the top with a side of mascarpone cream.
Made this recipe?
Please let me know if you liked it by leaving a ★★★★★ star rating and a review below. And remember to subscribe to my newsletter – it’s free!

Torta Della Nonna Recipe
Equipment
- 10 inch/25cm tart pan with a removable base
Ingredients
Pastry cream filling
- 2½ cups (590 ml) whole milk
- 2 teaspoons vanilla extract
- 4 egg yolks
- ¾ cup (150 grams) granulated white sugar
- ¼ cup (30 grams) all-purpose (plain) flour
Crust
- 2½ cups (300 grams) all-purpose flour plus extra for rolling
- 1 teaspoon lemon zest
- ¾ teaspoon baking powder
- pinch salt
- 6 ounces (1½ sticks / 170 grams) cold unsalted butter cut into small chunks
- ⅔ cup (130 grams) granulated white sugar
- 1 egg
- 1 egg yolk
- 1 tablespoon pinenuts
To finish
- powdered (icing) sugar for dusting
Instructions
To make the filling
- Heat the milk and vanilla extract in a medium saucepan until it just comes to the boil. Set aside to cool slightly.
- In a medium bowl, use a wire whisk to beat the egg yolks and sugar well until light and creamy. Stir in the flour.
- With a whisk, gradually add in the warm milk. Whisk well so that no lumps form.
- Strain the milk mixture back into the saucepan. Return to the heat and stir (I like to use a whisk) until it thickens. Boil for about a minute to cook the flour.
- Remove from the heat and pour into a clean bowl covering with plastic wrap. Press the plastic onto the surface of the filling to prevent a skin forming. Set aside to cool completely.
To make the crust in a food processor
- In a food processor, place the flour, lemon zest, baking powder, salt, and butter. Pulse until the mixture resembles breadcrumbs.
- Add the sugar, egg, and egg yolk then process until the mixture just starts to come together on the sides of the bowl.
- Remove to a work surface and knead very lightly until the dough comes together. If the dough is very sticky, add a little more all purpose flour.
- Once the dough has come together, flatten the dough into a thick round and wrap in plastic wrap, and chill for an hour.
To make the crust by hand
- To make the crust by hand, combine the flour, lemon zest, baking powder, and salt in a large bowl. Cut the cold butter into small chunks, then rub it into the dry ingredients with your fingertips until the mixture resembles breadcrumbs.
- Add the sugar, egg, and egg yolk then mix with a wooden spoon or spatula until the mixture starts coming together on the sides of the bowl.
- Remove the dough to a work surface and knead very lightly until it comes together. If the dough is very sticky, add a little more all-purpose flour. Don't overknead or the crust will be tough.
- When the dough comes together, shape it into a thick round, wrap it in plastic wrap, and pop it in the fridge to chill for an hour.
Assembling the torta
- Soak pinenuts in a small bowl of water.
- Preheat oven to 350ºF/180ºC and grease a 10 inch/25cm tart pan with a removable base with non-stick cooking spray.
- Divide the dough into two portions with one being larger. Rewrap the smaller piece and return it to the fridge. This dough is soft when warm so keep it chilled. Chilled dough is much easier to handle. If the dough becomes too warm to handle, chill for 30 minutes then continue with the recipe.
- Take the larger piece. Press it down to flatten and form a rough circle. Dust the pastry with flour.
- If the dough is very cold and hard, give it a few thumps with the rolling pin. This will make it more pliable. Alternatively, leave the dough at room temperature for a little while to soften. Keep in mind that this dough (like most doughs), rolls out better when cool and the butter within has not melted.
- Roll out the larger portion of dough between two pieces of parchment paper (nonstick baking paper) until large enough to fit the tart pan. Keep checking to see if the pastry is sticking. If so, dust with more flour. Don't skip using two sheets of parchment paper – one under the dough and one on top, plus extra flour to prevent sticking.
- Roll the pastry gently around the rolling pin, removing the parchment paper (nonstick baking paper) on the bottom as you go. Lift and unroll into the pan. Now you can remove the top sheet of parchment paper. Lift the pastry around the sides and gently encourage it to fall into the corners. If necessary, patch any tears with excess pastry. Trim the edges level to the top of the pan. Reserve the leftover dough.
- Spoon the cool pastry cream into the base. Spread and level the filling.
- Press the leftover dough onto the second piece, then roll out as you did with the first piece of dough and fit over the pastry cream, pressing the edges to seal and then trim off excess.
- Make a slit in the middle of the top crust then brush the top with water.
- Drain the pine nuts and sprinkle over the torta.
- Bake in preheated oven for 40 minutes.
- Allow to cool. Carefully remove torta from the pan and place on a serving plate. Dust with abundant powdered sugar. Serve at room temperature or chilled.
Notes
- When preparing the pastry cream filling it’s important to add the warm milk slowly to the egg mixture – whisking well.
- Boil the filling for a full minute to cook out the starch in the flour.
- Handle the dough lightly and don’t over work.
- If the dough is very sticky, dust well with flour when rolling.
- Keep the dough chilled for easier handling.
- Soak the pine nuts in water so they don’t burn.
Nutritional Estimate Per Serving
Nutritional Disclaimer
Nutritional information is an estimate provided by an online nutrition calculator. For accurate results, it is recommended that the nutritional information be calculated based on the ingredients and brands you use.
I made this recipe for the first time since my mother in law passed away. She used to make it but I never knew the recipe. I saw this recipe and gave it a try. When my husband tried it, he had tears in his eyes bc he was reminded of his mother’s torta. Thank you for this recipe! It’s perfect! ❤️
Caren, I’m so happy that this recipe was able to recreate beautiful memories for your husband. Thank you for sharing this with me.
I have made this recipe four times now and each time it turns out perfectly. Follow the directions and read the helpful hints. An Italian friend of mine asked me to make a Torta Della Nonna for her and I decided this recipe made the most sense to me. It’s absolutely perfect and my friend says it is better than getting it in Italy!
Maureen, thank you for taking the time to write such a detailed review and for the five stars! I love that your Italian friend says that it’s better than getting it in Italy. That’s a huge statement! Thank you from the bottom of my heart.
Italian desserts are the best- wasn’t it Catherine de Medici who brought the first Macarons over to France when she married King Henry !!? I love any custard-based dessert and yours looks great! I see that the addition of sugar in your crust recipe should give it a slight crunchy texture. BTW, you mentioned that you weren’t able to make comments on my blog but I’ve now fixed that!
It’s a great recipe, Fran! And yes, I agree, Italian desserts are absolutely the best. Thank you for letting me know that comments are open on your blog.
Can this dough be made with gluten free flour? I remember eating this delight when I was younger before having to eat gluten free.
I never have made this gluten free but if you’re skilled in gluten free cooking, you could swap out the flour for 1:1 gluten free flour. Let me know how it goes.
I don’t usually comment, but this is such a solid recipe. Hard to get it wrong and always turns out great. I bake a lot but I always get asked by the Mrs to make this one! It’s been a peace offering a couple of time as well….just saying.
Thank you so much for taking the time to comment, John. Glad that it’s such a winner for you. Peace offerings like this go a long way!
Great recipe!!! We loved it!!!
That makes me so happy to hear! It’s a special one for me, and I’m thrilled you loved it too. Thank you!
HI I made this last year for my husband’s birthday to celebrate his learning Italian. I will make it again this year. I don’t remember the “non stick” parchment paper. Is there a parchment paper labeled non stick? If so what brand? I think I used just regular parchment paper. the recipe was fantastic.
Yes, Mrs K, it’s all parchment paper in the USA is coated with silicone to make it non stick. I’ve used term to clarify it for readers from other countries that know it as “nonstick baking paper”. I will rewrite it so that it is clearer. I’m thrilled that you loved the recipe!
Am sure I used your recipe last year and it was amazing – but I keep thinking I added lemon peel to infuse in the milk ( removing it before use)! – but have noticed that you don’t use it in the filling?
Am confused as some recipes use it and others don’t! Am sure when I ate some in Italy that the filling had a delicate lemon flavour🥴
Please advise😊thank you
Sue, my Italian pastry cream uses lemon peel in the milk but for this recipe I just use it in the crust. Of course, if you like an extra lemony flavor, infuse it into the milk as in my pastry cream recipe.
This was a perfect recipe! Was in Tuscany last week and had this dessert for the first time. Knew I had to try and make it once I got home, and was so thankful to find this site. Made for my friend’s birthday and everyone raved. It was exactly same taste as having it in Tuscany, was excellent, and not hard to make. Will be on repeat for celebrations going forward. Thank you for this wonderful recipe!!
Lauren, I’m so happy to hear that it was such a success!
I’m going to give this one a whirl! My mum was a Tuscan-Italian, but I don’t recall her ever making one of these, so it will be in her honor and memory.
Q: ingredients for filling are at room temperature, yes? Ingredients for dough are cold?
Cheers!
ChrisP.
How wonderful to honor your darling mum by baking this wonderful torta in her memory! The ingredients for the filling don’t have to be a room temperature. It will work either way. However, the completed filling must be completely cool before spooning into the crust. The butter for the dough should be cold. Hope that clarifies.
the dough was impossible to work with
even with extra flour it would not stay together and would stick to everything except itself
Thank you for your feedback. This recipe has been carefully developed and tested, and it consistently produces excellent results for many readers, as reflected in the glowing reviews. When followed as written, the dough is soft yet manageable.
If the dough was sticking or not coming together, it’s likely that an incorrect measurement, substitution, or deviation from the instructions caused the issue. I provide detailed tips and instructions to guide readers and ensure success, so it’s important that these are read and followed closely. Precision with measurements, such as using the spoon-and-level method for flour, and following each step as written are key to achieving the intended results.
Also did you use non stick parchment paper for rolling out the dough as specified in the recipe. Please reread step #6 again and follow precisely.
I stand by this recipe and encourage you to try it again while carefully following the measurements and steps. It’s a trusted favorite, and I’m confident it will work beautifully when prepared as directed.
I made this for Christmas Day desert and it was delicious. I think I pretty much followed the recipe exactly and it turned out very well. I added a homemade raspberry sauce on top for a little extra and I would do that again. Next time, I don’t think I will use pine nuts though. They didn’t taste right to me with a sweet, maybe I will add sliced almonds or pecans, maybe pistachios. I will definitely make again. perfetto!
Thank you for taking the time to let me know about your Christmas Torta della Nonna. Pine nuts are traditional but you can use whatever you prefer.
Marcellina,
So I was ready to give you my first negative review, but I can’t. Instead the Torta Della Nonna turned out beyond fantastic.
I struggled with the pastry, why, because I forgot to follow your advice about using parchment paper. I didn’t for the base and that is where I struggled. I used the parchment for the top and it was perfect. Sorry to be so winded with my tribulations.
Bottom line, it was “incredibilmente buono”. My wife asked me to make another to bring to our good friends for Thanksgiving dinner. Just my luck — Just kidding. It will be my pleasure. Grazie molto!!
Phew! I’m so glad it turned out well for you, Larry. Yes, with this one, it’s important to follow the instructions about the parchment and use flour if it’s sticking. The pastry can be a struggle but the results are well worth it. Thank you for your very thorough feedback. That’s important to me so that I know if I need to add more tips. Much appreciated!