
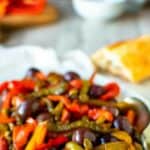
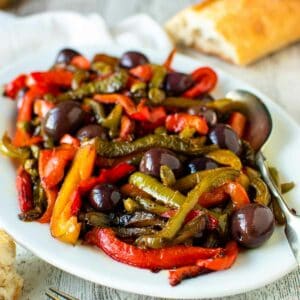
Italian Fried Peppers

Italian Fried Peppers are delicious and easy to prepare. These are so good, so tasty, and smell divine! Be prepared for the heady scent to bring the whole neighborhood to your doorstep.
The smell of these Italian peppers takes me right back to my childhood and to my mother who made them regularly. We especially enjoyed them with steak or roast chicken.
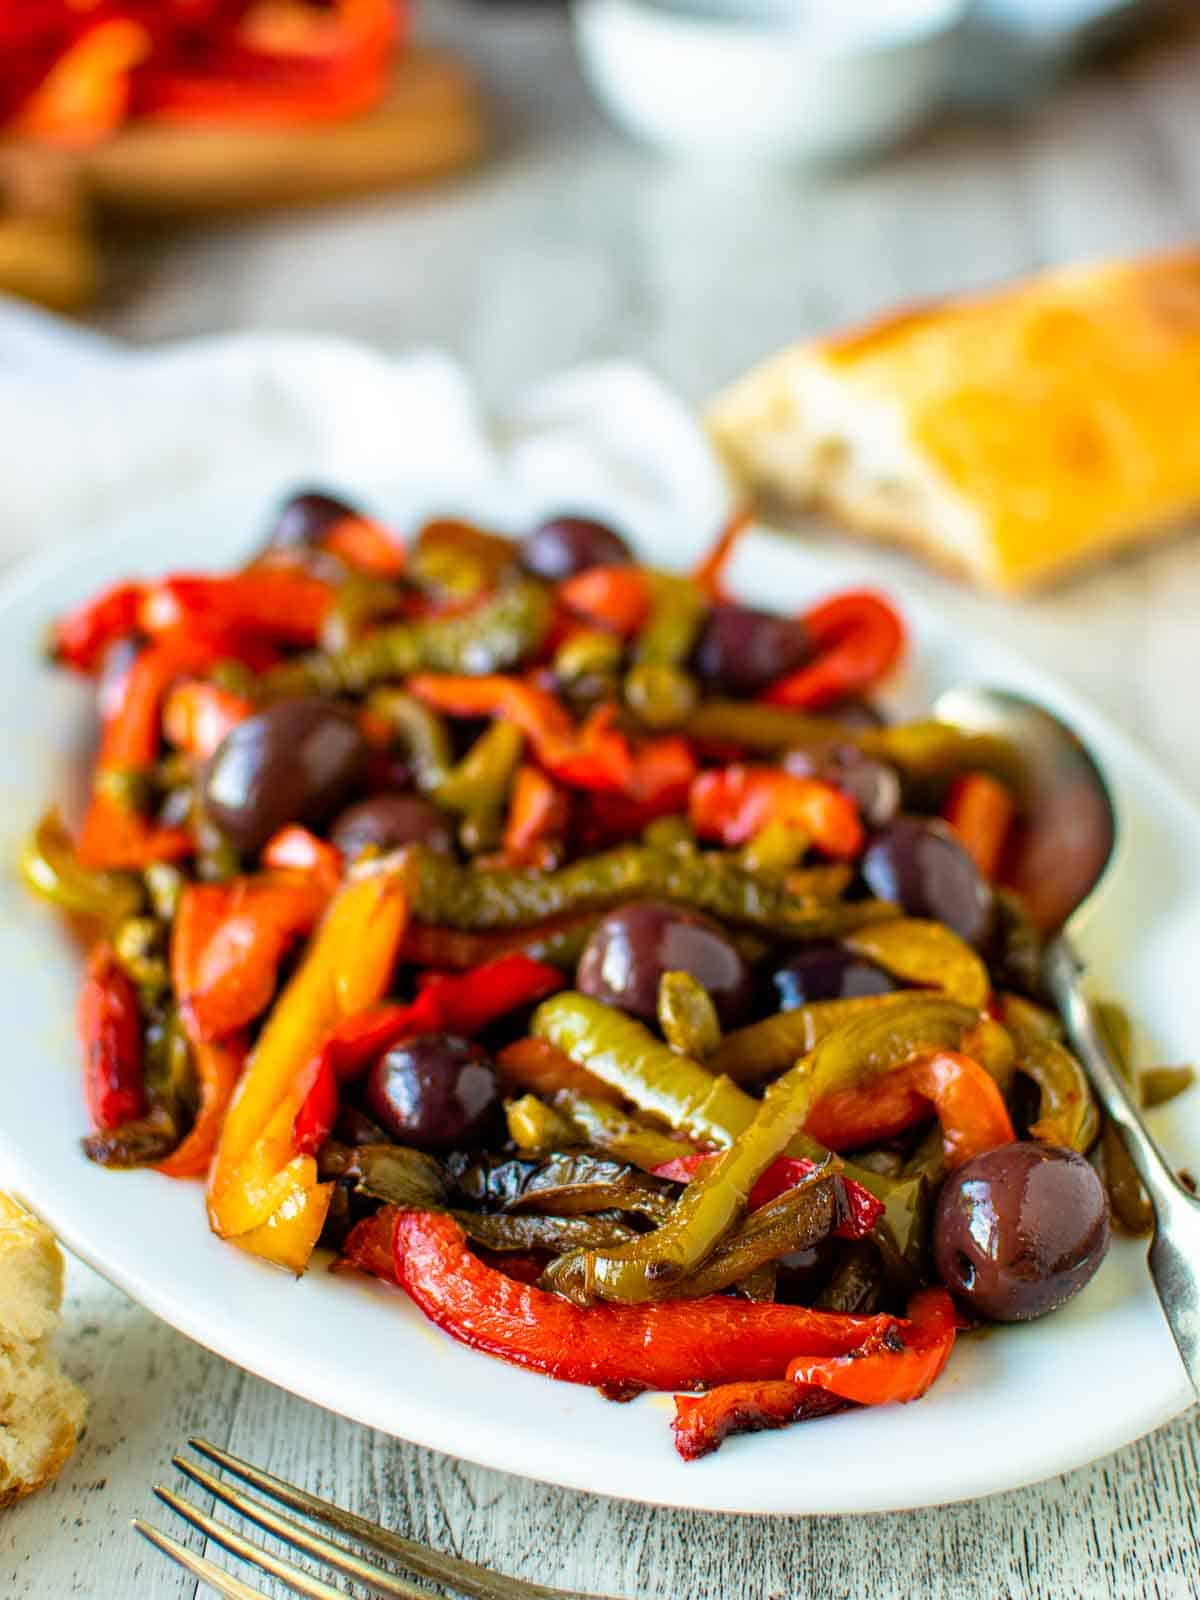
While these fried peppers are a great side dish, they also make a delicious bruschetta and excellent appetizer. And it’s hard to beat a summer lunch of Italian fried peppers with some crusty bread or grissini breadsticks and a little wedge of cheese.
Make double the amount, and keep it in the fridge for a quick lunch or side dish. In my house, we love to serve it with some Italian rice balls or some fried potatoes and onions.
If you love all types of peppers as we do, don’t miss these recipes – peperonata, roasted peppers and stuffed cherry peppers.
For complete ingredient quantities and full instructions, please scroll to the printable recipe card at the bottom of the page.
Ingredients
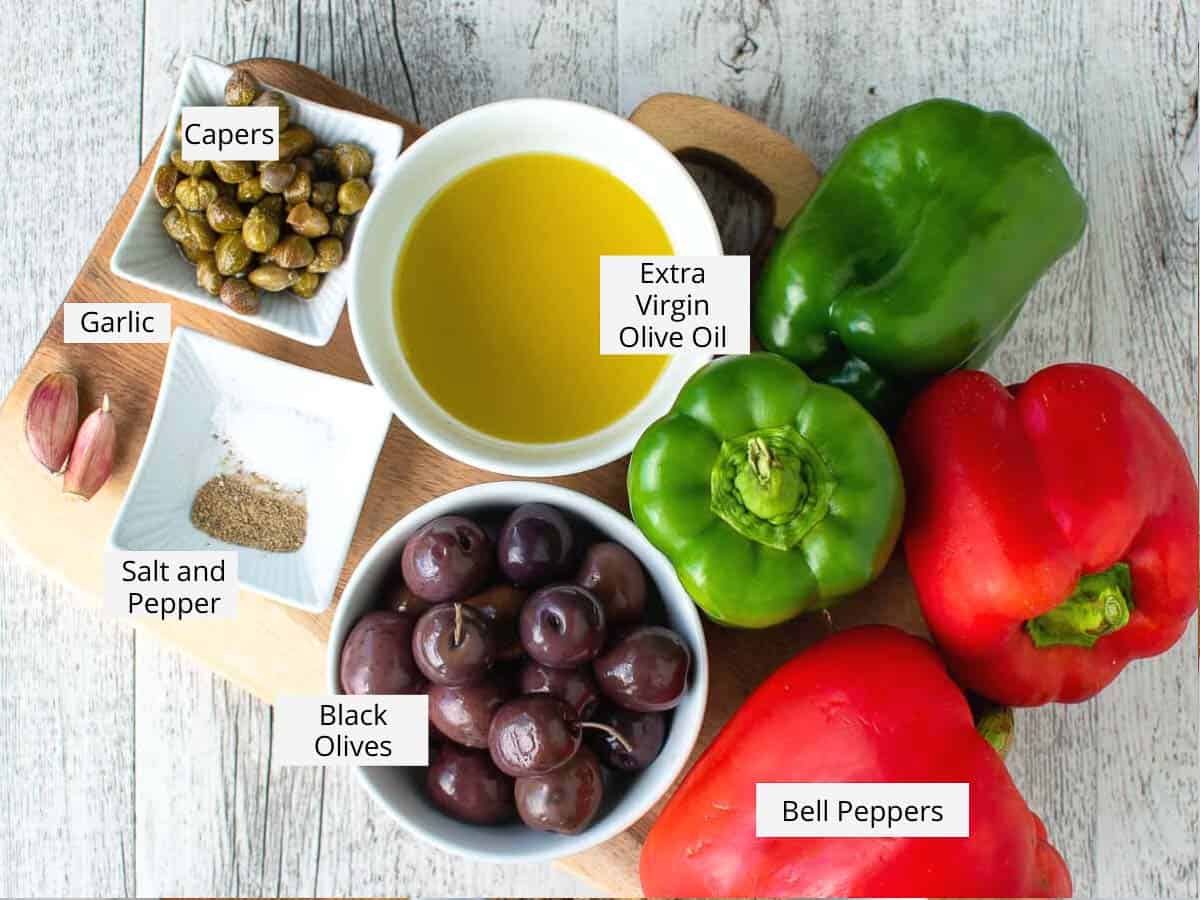
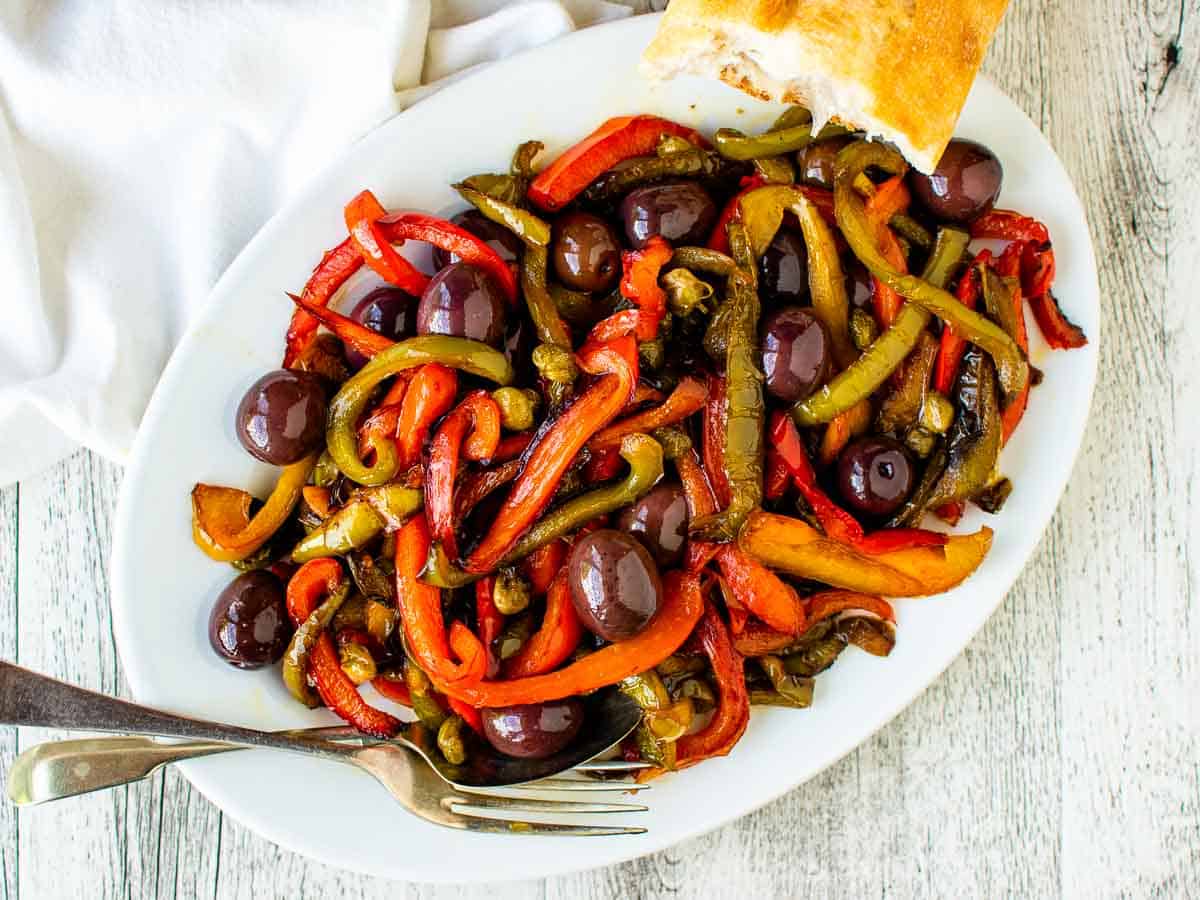
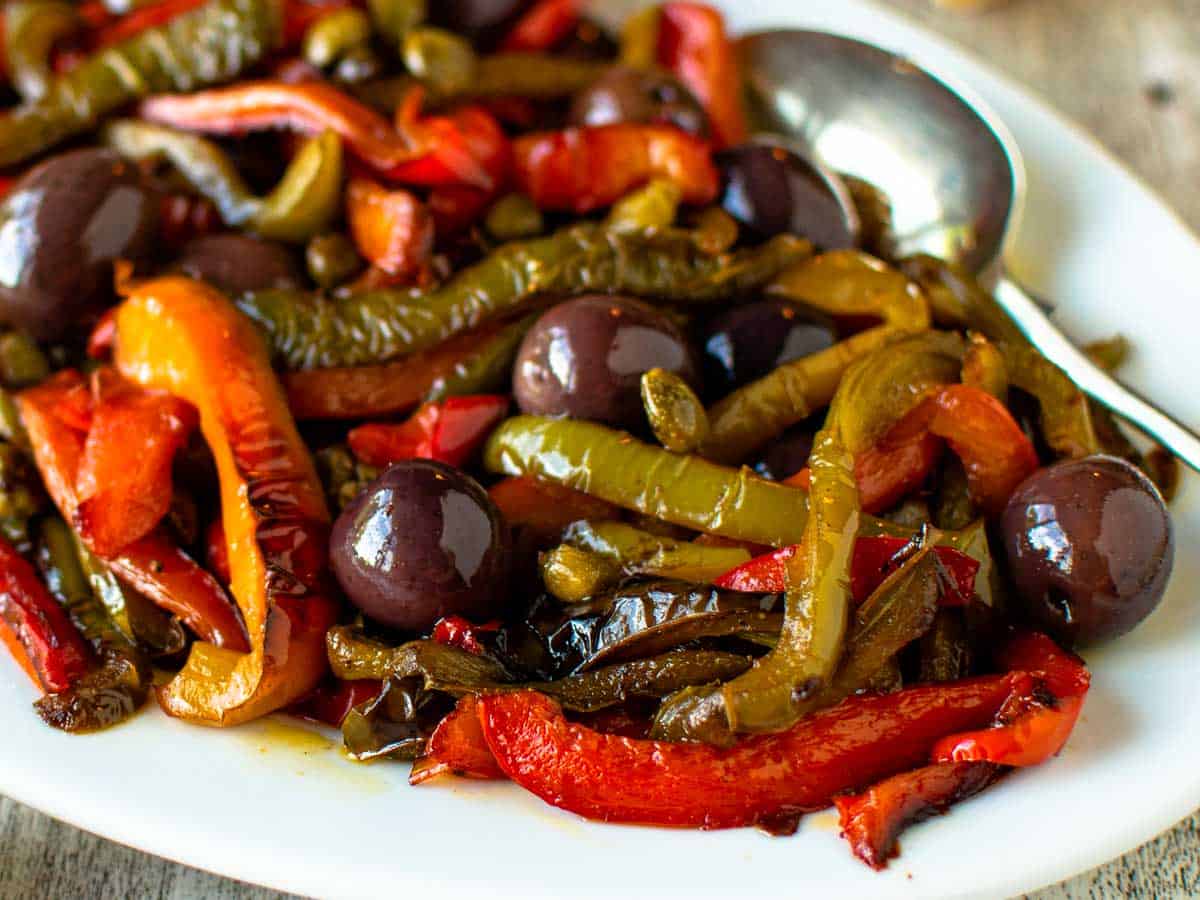
- Bell peppers – Choose firm, unblemished bell peppers that are heavy for their size. This means they’ll have thick flesh. Different colored bell peppers can be used but always include at least one red pepper because they are the sweetest.
- Extra virgin olive oil – This gives the best flavor but if you only have regular olive oil that will be fine.
- Black olives – I like to leave them whole because my family are accustomed to eating around the stones. However it’s a good idea to use pitted black olives to lessen the chance of any mishaps with olive stones.
- Capers – For this recipe, I’ve used capers in vinegar. If you have salted capers, you can use those. Be sure to wash off excess salt.
- Garlic cloves – Fresh garlic cloves gives the best flavor. The garlic cloves goes in whole so the flavor is subtle. At a pinch, you could use ½ teaspoon of bottled, minced garlic. The flavor will be different but still good.
- Ground black pepper – Grind the black pepper freshly for the best result.
- Salt – Use sea salt with no additives.
Variations
- When in season, you can use Italian frying peppers. These are the long, tapered variety and are excellent for frying. Also known as Italian sweet peppers or Cubanelle. My personal favorite is the Corno di Toro variety. Italian frying peppers are sweet at every stage from green through to red. The flesh is thinner than bell peppers which means they’ll cook more quickly.
- Substitute pitted green olives instead of black olives.
Instructions
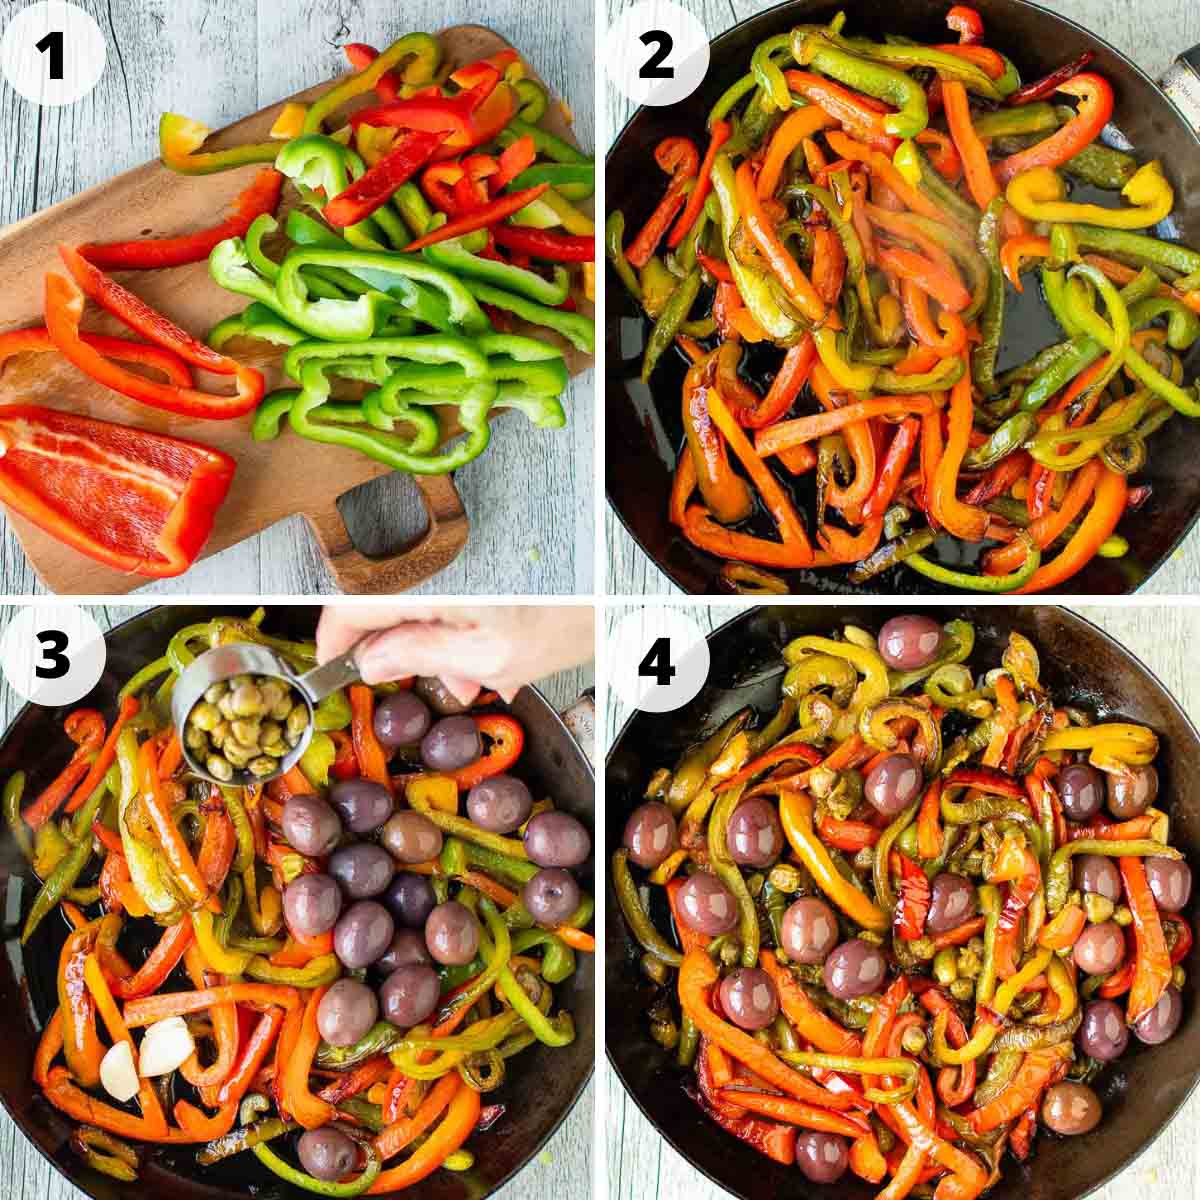
- Wash and dry the bell peppers, core, deseed, and remove any white ribs. Slice into ¼ inch (6mm) strips.
- Heat the olive oil in a pan over medium-high heat. When hot add the peppers and fry for 10-15 minutes.
- Add olives, capers, and garlic, and continue to fry for a couple of minutes.
- Reduce the heat a little and continue to cook over medium heat until the peppers are tender. Season with salt and freshly ground black pepper.
Equipment
You’ll need a wide shallow frying pan or skillet for this recipe. The wide pan allows the bell peppers to be spread out and the moisture to evaporate. A pan that is too small will mean the bell peppers will stew instead of fry.
Tips for Success
- Be sure to dry the peppers well before slicing and if they’re really juicy, pat dry with a paper towel. This is important because you’ll be adding them to hot oil and any moisture will cause the hot oil to spit.
- Use a wide shallow pan so that the moisture evaporates quickly out of the bell peppers and it doesn’t stew. As the peppers cook spread out in the pan to ensure the moisture evaporates and the peppers fry well.
- The real secret to making Italian fried peppers is to watch them closely and pay attention that they don’t burn, stick, or stew. Frying at medium-high heat is important because peppers contain a lot of water which is released as the vegetable cooks. If the moisture doesn’t evaporate quickly the peppers won’t fry but instead will stew.
- It’s important for the peppers to brown and caramelize on the edges for optimum flavor. Don’t cover it with the lid or the steam will be trapped and the peppers won’t fry.
- Add salt at the end. Salt draws out moisture which again means the peppers will stew instead of fry.
FAQ
Red or yellow bell peppers are good for frying. Green bell peppers are a little bitter so be sure to mix them up. Italian frying peppers are great if you can get them. We grow them in our backyard garden but you can also find them at most supermarkets when in season.
Yes however be sure to have a pan large enough that doesn’t crowd the peppers. As I said earlier, the enemy of these Italian-style fried peppers is moisture and if the peppers are crowded, evaporation is limited.
Store in a sealed container in the fridge for 3-4 days.
Serving Suggestions
These flavorful peppers make a tasty sandwich tucked into crusty bread with some marinated eggplant. We also love eating this with mozzarella in carrozza – a delicious fried sandwich.
You can serve these Italian fried peppers warm or cool and they make a great side dish to grilled, barbequed or roast meats like my butterflied roast chicken. Complete the meal with a serving of cauliflower made in the instant pot and pasta with garlic butter sauce. I’ll guarantee that you’ll make these Italian fried peppers once and want to make them all the time. Yes, this recipe is that good!!
Made this recipe?
Please let me know if you liked it by leaving a ★★★★★ star rating and a review below. And remember to subscribe to my newsletter – it’s free!
Italian Fried Peppers Recipe
Ingredients
- 2 pounds bell peppers 900 grams
- ¼ cup extra virgin olive oil
- 1 cup black olives
- ¼ cup capers
- 2 cloves garlic cloves
- ⅛ teaspoons ground black pepper
- Pinch of salt
Instructions
- Wash and dry the peppers. Cut in half, remove the core, seeds and white ribs. Slice into long slices. Try to slice the peppers equally so that it all cooks at the same time.
- Place a fry pan or skillet of about 11 inches (28 cm) over medium high heat. Add oil.
- Fry sliced peppers in hot oil for 10-15 minutes stirring gently every now and then until the peppers begin to brown on the edges. The peppers need to FRY! Otherwise at a lower heat the peppers will sweat and the skins will come off
- Don’t leave because they will stick and burn easily. Stir gently so as not to break the slices. This initial frying is the hardest part because you have to pay attention that the peppers don’t burn and the oil tends to spit.
- Once the peppers have started to brown on the edges (around 10-15 minutes of frying), add the garlic, olives and capers. Don’t add salt yet because salt draws out moisture and again the peppers will sweat and stew instead of fry.
- Continue to fry, stirring at medium high heat for another 2 or 3 minutes.
- Reduce heat and cook over medium heat for another 5-10 minutes or until the peppers are cooked through. Regularly stir gently so as not to break up the peppers.
- Taste and season with a little salt and ground black pepper to your taste.
Notes
- As the peppers cook, spread out in the pan to ensure the moisture evaporates and the peppers fry well.
- The real secret to making Italian fried peppers is to watch them closely and pay attention that they don’t burn, stick or stew.
- Frying at high heat is important because peppers contain a lot of water which is released as the vegetable cooks. If the moisture doesn’t evaporate quickly the peppers won’t fry but instead will stew.
Nutritional Estimate Per Serving
Nutritional Disclaimer
Nutritional information is an estimate provided by an online nutrition calculator. For accurate results, it is recommended that the nutritional information be calculated based on the ingredients and brands you use.
This post was originally published on January 5, 2018. It has been updated with new photos, more information, and an improved recipe.
This was very delicious! I served it with your Baked Italian Chicken Thighs (absolutely amazing!).
My issue is that it was greasy. I followed your recipe to the letter. Two pounds of peppers equaled five peppers. If I cut back on the oil, will that impact the frying process? Thank you.
Yes, five peppers sounds sounds about right. I used four large ones to get 2 pounds. But this recipe is very adaptable. It’s the technique that is more important than anything. A quarter of a cup of oil for that quantity of peppers shouldn’t be too oily or greasy but certainly cut back if you prefer. I think it may mean that the peppers could burn. Keep a careful eye on them when using less oil.
Thank you. I will try that next time, definitely watching them as the peppers cook.
You’re welcome, Karen!
I’m in Piemonte when I make these peppers. OMG, but this is a fabulous recipe. I’ve been searching for one that explained how to avoid stewing the peppers. Of course, being the anchovy nut that I am, I melted three Cantabrico anchovy filets into the peppers and dropped four over the dish when I served it. I also tried it with purple bell peppers. Thanks, Marcellina, for another Golden Goal recipe.
Suzanne, I’m thrilled that you loved this recipe! Yes, there is a bit of trick to ensuring that the peppers don’t stew. It’s easy once you’re know. Adding Cantabrico anchovy filets is just wonderful!
Thanks for the tip about charring the peppers and also not covering the pan with a lid. Looks good enough to be served as the main dish!
Fran, that’s so true! I’d eat a whole plateful of these.
So happy that someone mentioned Italian Fryers.I use them with Sausage or with eggs. I usually broil the roasters. peel and slice. Good olive oil. garlic. oregano and a squirt of anchovie paste. Great over cutlets or pork chops. Mom came from Potenza.
Italian Fryers are a wonderful variety of sweet peppers. I use them whenever they’re available. Your suggestions are delicious, Bobby!
Hello…can you please specify the type of black olives you are referring to? Are they canned? From an olive bar? Marinated? Greek? Italian?
Thank you.
Hello Sandy. Any black olives that you enjoy the taste of will work. I prefer not to use marinated black olives because I don’t want the marinade flavor in the dish.
Very tasty and easy to do.
Yes, it is, isn’t it? Glad you love it!
Delicious side…..I added dried thyme and a chopped red onion shallot at the end….coz I like the taste of a semi-cooked red onion….a bit of crunch…..oh….I also stirred in a squeeze of fresh lemon juice too….tnx…..this is so appetizing and flexible to add other things that take your fancy!!
My Nana made these all the time.
Our family called that dish “Bebe”
Does any else know it by that name?
That’s so interesting, Dennis! I don’t know it by that name but maybe someone else does.
Oh Marcellina my mouth is watering over this dish. It has all the ingredients that I just love. I’m just going to have to try harder to grow more capsicums, we’ve had moderate success, but boy can I grow chillies. Cant’ wait to try this dish. Thanks for sharing a family recipe. Best wishes, Pauline
Pauline, you’d love this! Have you ever tried to grow the long sweet capsicums? They are easier in our climate. My husband has great success with the Corno di Toro variety.
Yes you’re so right Marcellina. This recipe is one of our classic favorites, here in South Italy. Your tips for frying the peppers correctly are perfect. Thank you.
Thank you! I grew up eating these and learnt from my mother who was from Calabria.
Hi I was born in Calabria and now live in British Columbia CANADA….my mom made these all the time and now I make a freeze them for the winter. I just made 25 lbs. DELICIOUS over mashed potatoes 💜💜💜💜💜
My mother was born in Calabria, Isa! I didn’t even think to freeze them. Great idea!
A classic! I practically live on fried peppers in the summer… 😉
So good, Frank!
I made is with peppers I roasted on my gas flame and rubbed the skins off of. It is totally delicious.
I’m sure it would have been amazing! I love roasted peppers!
I like to add a bit of white wine vinegar. My Late Mother in law was from Napoli. She used to steam the whole peppers with say a ratio of 1 Cup water to half a cup vinegar. Then after drying she put the Origano, garlic and Olive oil. Or some times she roasted the peppers then peeled. Added the above.
What you late mother-in-law made sounds very similar to my family’s Italian Roasted Peppers. So good!
Hello Marcellina,
How long does this keep in the refrigerator? And if it does, would one just take out to return to room temp before serving?
Hi Michelle, this would keep easily 3 or 4 days maybe longer. It can be eaten directly from the refrigerator (which is nice in summer) or return it to room temp or heat it before serving. Thanks for stopping by xx