
Portuguese Sweet Bread


This Portuguese Sweet Bread is a luscious, soft bread from Portugal but very popular in other parts of the world too!
With this recipe, you can easily make it yourself at home. Here you’ll find all the tips to create a tender, homemade loaf that your family will love!
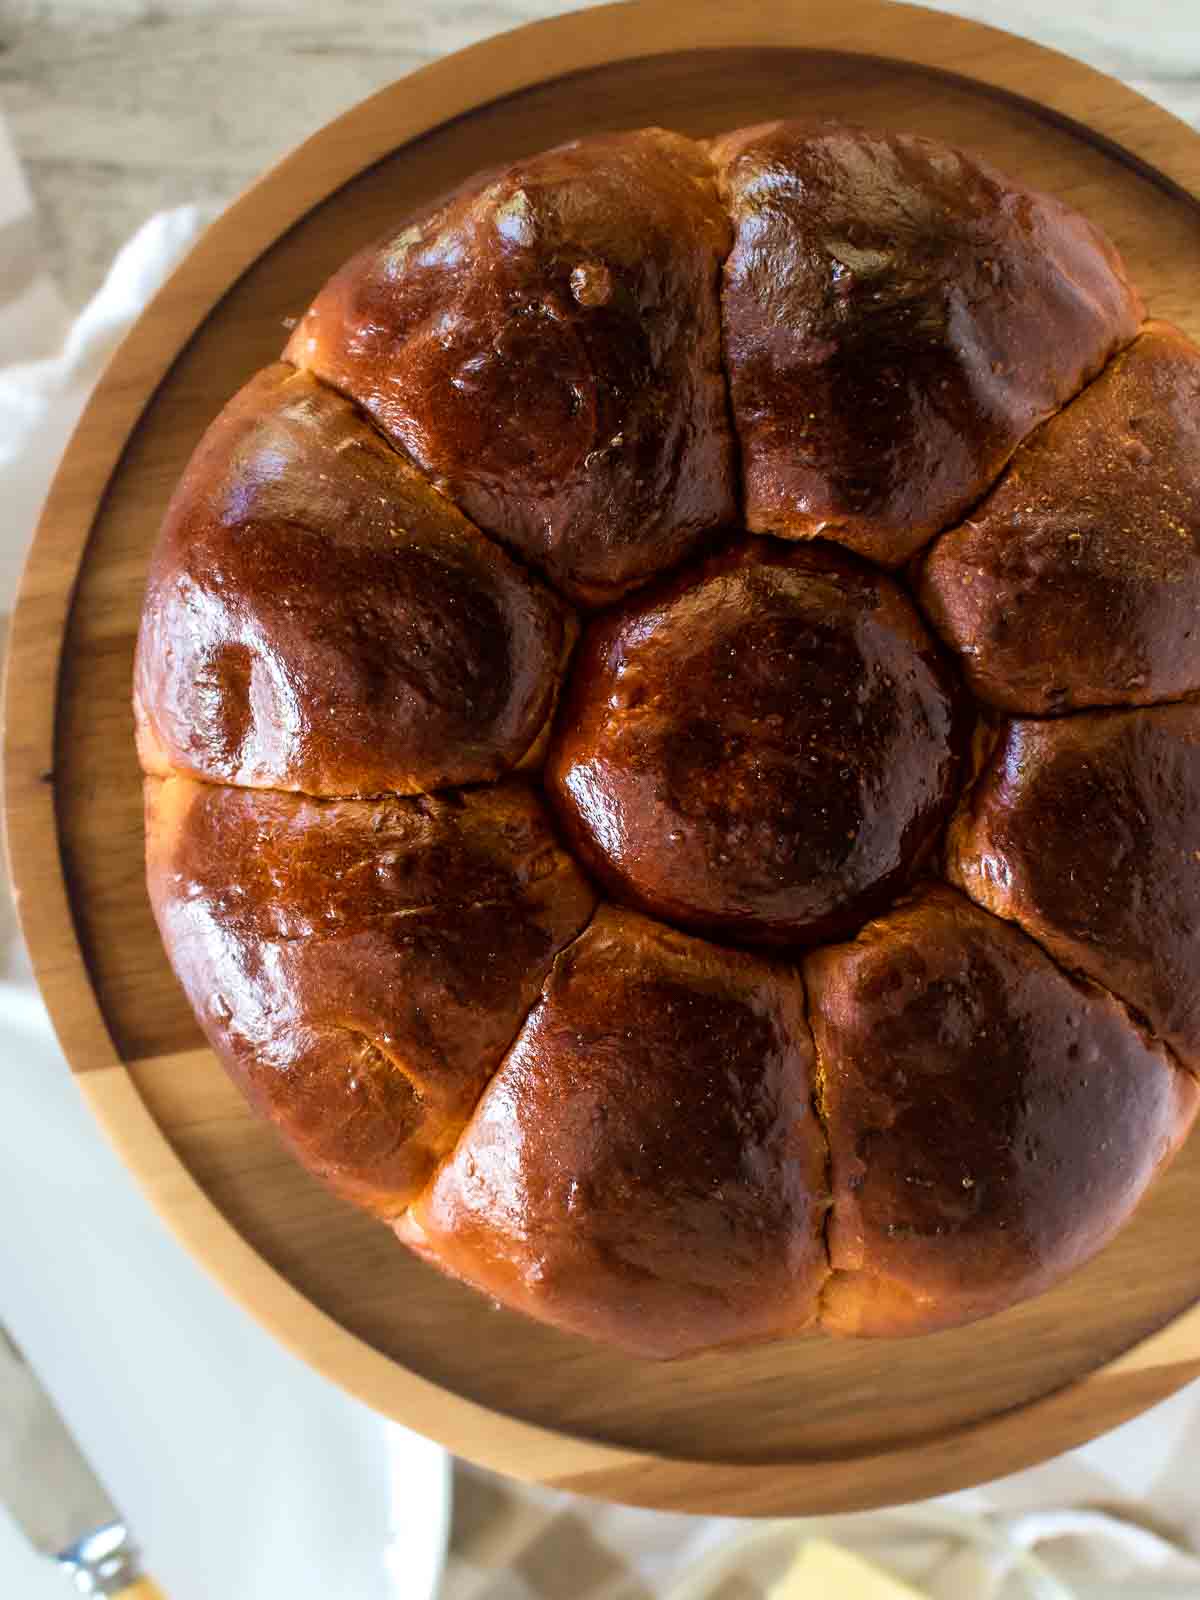
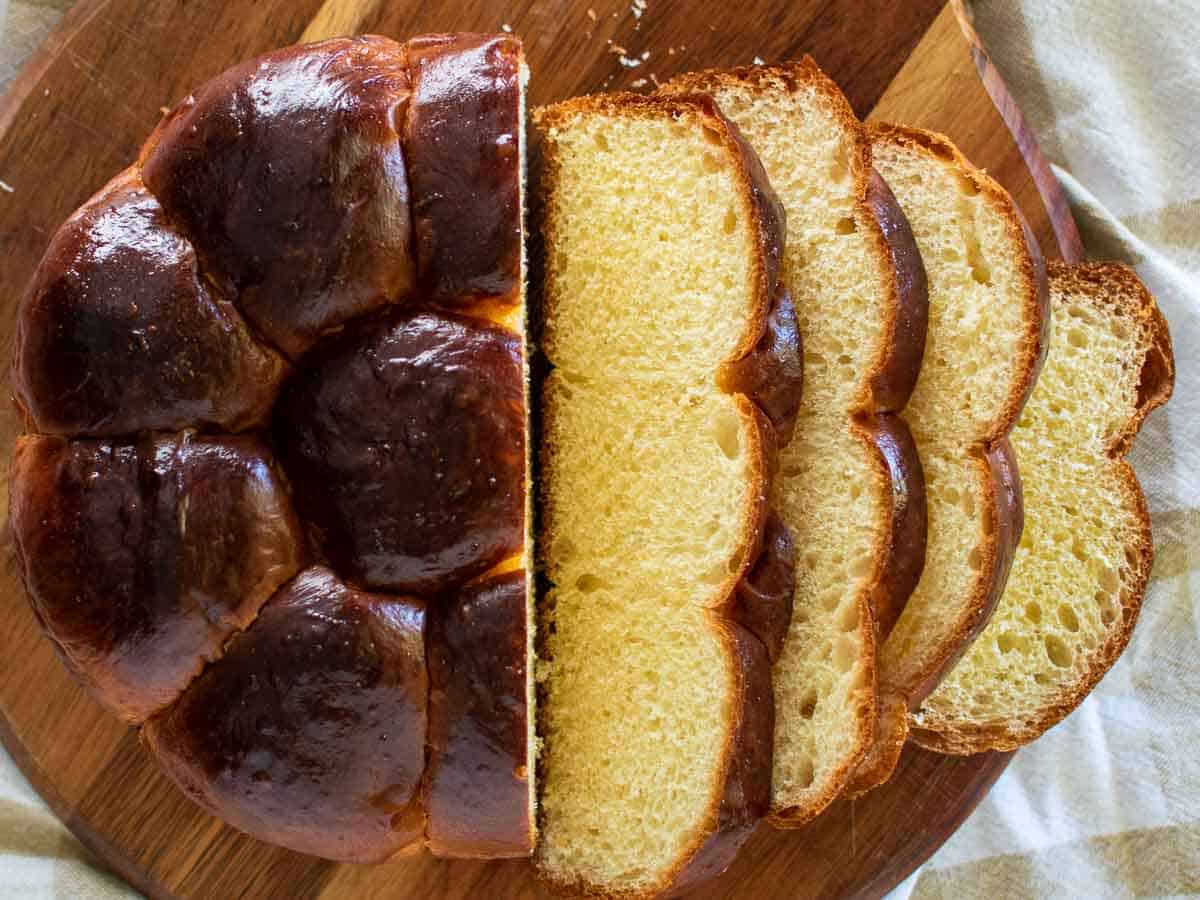
Popular with Portuguese families at Christmas and Easter, this originally is a sweet bread of the islands of Portugal. Having a deep golden brown color when baked, Portuguese Sweet Bread is light, tender and airy within. It’s enriched with butter, eggs and whole milk, making it totally irresistible!
This sweet bread recipe makes two loaves but I often make one loaf and then form the other half into rolls. Either way, you won’t have any waste because this bread makes the best toast or French toast as well! Or you could gift the second loaf to someone special.
There’s no way around it. This bread will take a little time and effort. However the results are worthwhile producing the wonderful fluffy texture. Best of all, everyone will to love you because you made this Portuguese sweet bread and gobble it all up!
Why you’ll love this recipe
- Soft and Tender – The texture of this bread is amazing! So soft, delicate and cloudlike when eaten very fresh.
- Outstanding Flavor – With a hint of lemon, vanilla and well developed flavor of the initial sponge, this bread has the most wonderful taste. Adults and children will all love this delicious Portuguese Sweet Bread.
- Homemade Difference – Baking this bread at home is rewarding, satisfying and achievable. If you usually buy sweet bread at the bakery, try making it at home and surprise your family!
- Versatile – Portuguese Sweet Bread is excellent fresh without anything added. But it’s also delicious spread with butter, jam or honey. After a day or two, toasting and serving it warm is just as good. This bread also makes amazing French toast.
- Festive – Traditionally this bread is served at Christmas and a variety of it is served at Easter. Add it to your festive table to begin a new family tradition.
For complete ingredient quantities and full instructions, please scroll to the printable recipe card at the bottom of the page.
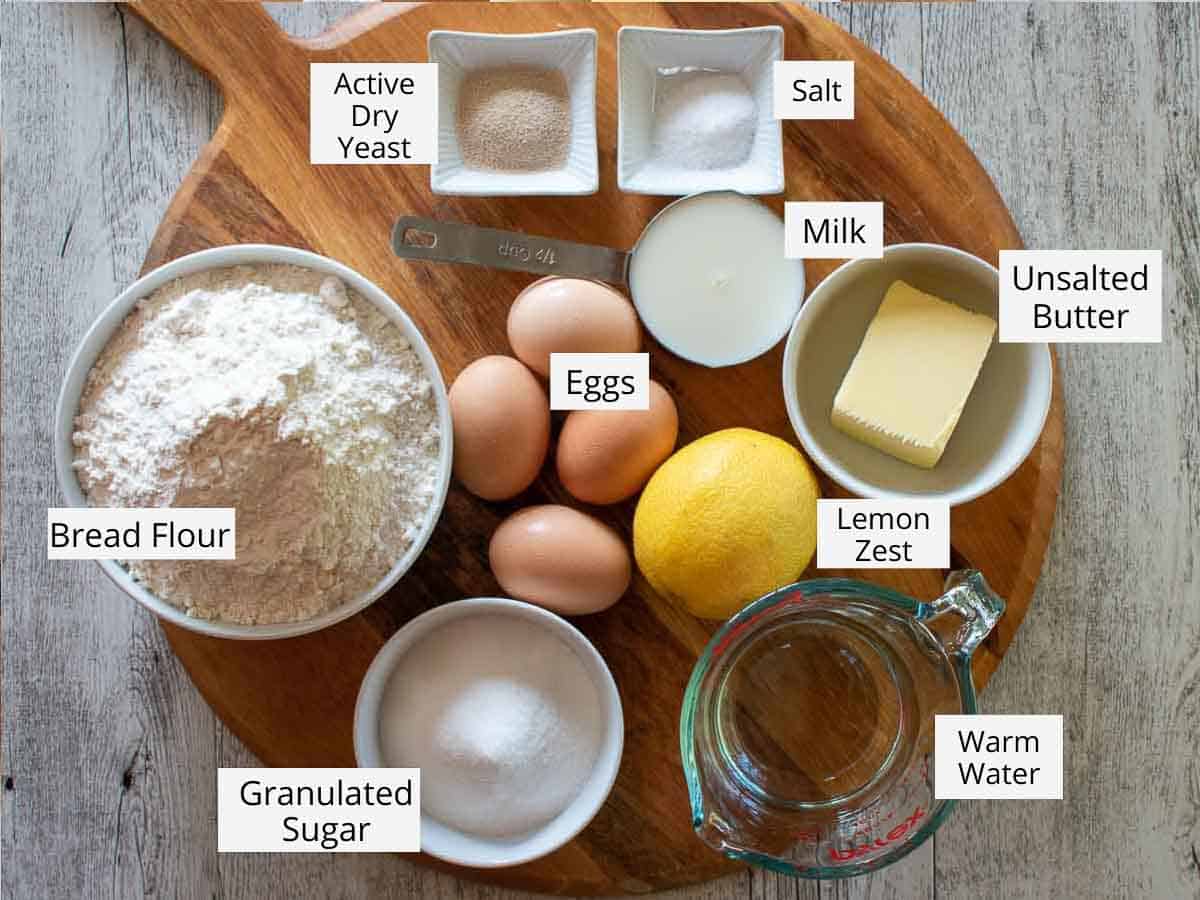
Ingredients
There is nothing more fascinating than baking with yeast. Yeast is so alive and powerful that it transforms simple flour into a living, breathing being. The dough for this recipe is very similar to the much loved Italian cream buns, Maritozzi. It’s fluffy, light and delicious!
- Bread flour – Easily available in most supermarkets, this flour has extra gluten to create a strong dough and gives great structure in yeasted dough recipes. All purpose flour wouldn’t give the same results in this recipe.
- Active dry yeast – Also available at most supermarkets and comes in easy to use, perfectly sized sachets. Be sure that the yeast is fresh.
- Warm water – Not too hot which will kill the yeast.
- Unsalted butter – European-style unsalted butter is excellent in this Portuguese sweet bread recipe and gives a wonderful flavor. Regular unsalted butter will be fine though. Use salted butter if that’s what you have but omit the added salt.
- Granulated sugar – white granulated sugar is the one you’ll need for this recipe. It will help create that dark, burnished crust.
- Eggs – I like free range eggs but use whichever type of eggs you have.
- Whole milk – I have made this recipe with reduced fat milk but I’ve found that whole milk adds extra moisture and richness.
- Lemon zest – Just the zest is used in this recipe for flavoring. If you can find organic lemons, that’s great otherwise wash them well.
- Salt – Just the right amount to bring out the flavors.
See recipe card for quantities.
Instructions
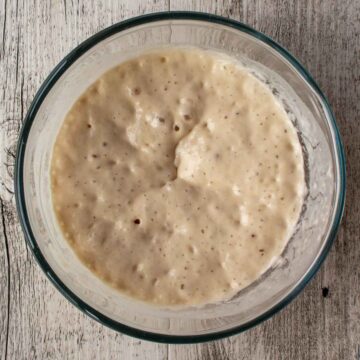
Mix together flour and yeast for the sponge then stir in warm water. Cover with plastic wrap and allow it to stand at room temperature for 60 minutes.
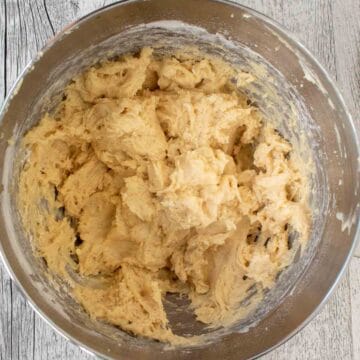
In the bowl of a stand mixer with the flat beater attached, combine the butter, sugar, lemon rind and salt. Add eggs, then milk and sponge followed by almost all the flour.

Switch to a dough hook. Add the remaining flour and knead on low speed for 5 more minutes.

Scrape the dough onto an oiled work surface. With oiled hand fold the dough 6 times. Form into a ball.
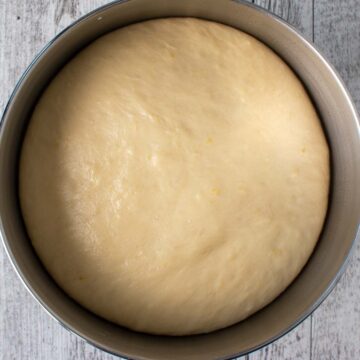
Return the dough to a cleaned and oiled bowl and allow the dough to rise in a warm place for 2 hours.

Divide the dough in half and then each half into 9 equal portions. Shape each portion into a ball.
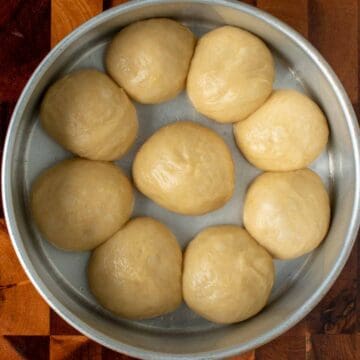
Arrange 18 balls of dough into two oiled cake pans. Allow to rise until doubled. Preheat the oven to 350ºF/180ºC.

Brush the loaves with egg wash and bake for 25-30 minutes or until the loaves are dark, golden brown and cooked through.
Allow to cool for 5 minutes. Then gently tip the loaves out of the pans. Upturn and cool on wire racks.
Hint: Though it seems like a long process, it is the resting and rising that takes up the bulk of the time. Remember, practice makes perfect. Don’t be discouraged if your first attempt isn’t perfect. Baking is a skill that improves with time and experience.
Substitutions
- Active dry yeast – Instant yeast can be used in the same way and in the same quantity.
- Unsalted butter – Instead of unsalted butter, you can use salted butter. Be sure to reduce the salt by half.
- Lemon zest – If you don’t have lemons, use a few drops of lemon extract or oil.
- Whole milk – Evaporated milk can be used and is often used in other variations of this recipe.
Variations
- Add-ins – Add ½ cup of chocolate chips, raisins or candied fruit when folding the dough in step 6.
- Spices – When adding the flour mix in a teaspoon of ground cinnamon, cardamom or whatever sweet spice you enjoy.
- Orange zest – Instead of lemon zest, use orange zest for a different citrus twist.
- Sugar Topped – Sprinkle sugar crystals over the surface before baking to add an extra touch of sweetness and crunchiness.
- Sweet Portuguese Rolls – Divide the dough as described in the recipe. Then form each portion of dough into a ball. Set slightly apart on a large baking sheet and allow to rise. Baking time will be 12-14 minutes.
Equipment
A stand mixer will make this Portuguese Sweet Bread recipe much easier. This is a soft and sticky dough that is a bit difficult to knead by hand. It can be done though by hand though, so don’t be deterred.
You will need 2 round cake pans with a diameter of 8 inches (20cm). Plus, the usual baking essentials like measuring cups and spoons or electronic scales, spatulas or scrapers, wooden spoons, a pastry brush and bowls.
Storage
Portuguese Sweet Bread is best served the day it’s baked. Leftovers can be stored in a sealed plastic bag or an airtight container at room temperature for up to 2 days. This bread is delicious toasted and spread with butter and honey or jam.
To freeze, wrap the bread slices well in several layers of plastic wrap and then put them into an airtight container. Freeze for up to 2 months. Thaw without unwrapping. I also like to slice the bread before freezing so that I can just take out one slice to toast for my breakfast.
Top tips

- Be sure to have fresh yeast, even dried yeast becomes stale and inactive.
- The sponge should become bubbly and frothy. If it doesn’t, either the water was too hot and killed the yeast or the yeast is stale. You’ll need either cooler water or fresh yeast.
- It’s important to let the dough rise to achieve a light and airy texture in the final loaf.
- Room temperature affects how yeast dough rises. On a warm day, the dough will rise more quickly than on a cool day so it’s important to trust visual cues not strictly times specified in recipes.
- If it’s a cool day and you want the dough to rise more quickly, put a pan of hot water in a switched off oven. Place the bowl of dough on the rack above the water, shut the oven door and let the yeast do its work. Alternatively, fill the kitchen sink with 2 or 3 inches of warm water. Then put the bowl of dough in the water taking care that the bowl doesn’t float.
- This dough will be sticky but don’t add any more flour or knead on a floured surface. Use oil on your hands to fold and form the dough. As you fold the dough it’ll become easier to handle.
- To shape the rolls, cup your hand over the portion of dough and roll gently in a circular motion on an unfloured surface to form a ball. Use the friction of the surface to help with the rounding of the ball. Alternatively, pull the edges into the middle to form a ball. Press the edges together so they don’t spring back.
FAQ
Portuguese sweet bread is known as pão doce which translates to sweet bread or massa sovada which translates to kneaded or beaten dough. It’s traditionally made for Christmas with a similar version being made for Easter. Now it’s available year round.
Yes, Portuguese sweet bread was brought to Hawaii by immigrants from the islands of Azores and Madiera. It became so popular that it’s now considered a classic in Hawaiian cuisine and enjoyed throughout the United States.
Yes, this Portuguese sweet bread freezes beautifully. Wrap the loaf tightly in several layers of plastic then a heavy duty zip lock bag and freeze for 3 months. Occasionally I like to slice the whole loaf before freezing. Then I can take just one or two slices out to be toasted for breakfast.
Related
Looking for other recipes like this? Try these:
Mini Chocolate Panettone
Nutella Bread
Banana Bread with Nutella
Caramel Cinnamon Rolls
Pairing
These are my favorite dishes to serve with Portuguese Sweet Bread:
Microwave Strawberry Jam
Mascarpone Cream
Sweet Ricotta Recipe
Made this recipe?
Please let me know if you liked it by leaving a ★★★★★ star rating and a review below. And remember to subscribe to my newsletter – it’s free!

Portuguese Sweet Bread Recipe
Ingredients
Sponge
- ½ cup (65 grams) bread flour
- 2¼ teaspoons (7 grams) dry active yeast
- ½ cup (120 mls) warm water
Dough
- 6 tablespoons (3oz/85 grams) unsalted butter at room temp
- ½ cup (100 grams) granulated sugar
- finely grated zest of 1 lemon
- 1 teaspoon salt
- 3 large eggs at room temp
- ¼ cup (60 mls) milk at room temp
- 3 ½ cups (455 grams) bread flour or as needed
- 1 egg (extra) beaten with 1 teaspoon water, for egg wash
Instructions
To make sponge
- Mix together flour and dry active yeast then stir in warm water. Cover the bowl with plastic wrap and allow it to stand at room temperature for 60 minutes. It will rise and then fall back on itself. It should have a pleasant yeasty smell.
To make the dough
- In the bowl of a stand mixer combine the butter, sugar, lemon rind and salt and beat with a flat beater for 3 or 4 minutes.
- Scrape the bowl then add the eggs one at a time beating well after each. It will look curdled but that's ok.
- Mix in the milk and the sponge.
- Add all but 1 cup of the flour and beat on low. Increase the speed to medium and beat for 5 minutes.
- Switch to a dough hook. Add the remaining flour and knead on low speed for 5 more minutes until the dough is soft and supple.
- Oil your work surface with a little flavorless oil. Scrape the dough onto the oiled surface. Oil your hands as well. Flatten the dough into an oblong shape then fold in half. Turn the dough 90º then repeat the flattening and folding. Fold 6 times including the first folding. Form into a ball.
- Clean out the bowl and rub with a little oil. Place the dough into the bowl and turn over to coat with oil. Cover bowl with plastic wrap and allow the dough to rise for 2 hours.
- Divide the dough in half and then each half into 9 equal portions. Shape each portion into a ball.
- Coat two 8inch/20cm cake pans with non stick cooking spray. Arrange 9 balls of dough in each pan. Spray the tops of the dough lightly with cooking spray and cover loosely with plastic wrap. Allow to rise until doubled. This second rise will take about 1 hour.
- Preheat the oven to 350ºF/180ºC.
- Brush the loaves with egg wash and bake for 25-30 minutes or until the loaves are dark, golden brown and cooked through.
- Allow to cool for 5 minutes. Then gently tip the loaves out of the pans. Upturn and cool on wire racks.
Notes
Nutritional Estimate Per Serving
Nutritional Disclaimer
Nutritional information is an estimate provided by an online nutrition calculator. For accurate results, it is recommended that the nutritional information be calculated based on the ingredients and brands you use.
This updated and improved recipe was first published on Marcellina in Cucina on Oct 19, 2017.


Love these recipes have baked numerous of them as they are easy to follow and usually turn out quite well. My bread just came out of the oven and was incredibly simple to roll and make. I found flouring my hands slightly before rolling the dough made it extremely easier as I wasn’t using a electric mixer. Haven’t yet cut into my bread but looks delicious. Thank you for this dish and the many others you have introduced me to.
Thank you for the wonderful and thorough feedback. Glad you enjoy the recipes. You’re welcome!
Mine came out a bit dry. Do you think I may have over mixed it or baked it too long? I did 30 mins at 350.
Sarah, perhaps you baked it a little too long. This bread shouldn’t be dry. Ovens do vary so maybe yours runs hot. Time baking for a little less time or at a slightly lower temperature.
Curious, I am looking at this recipe compared to a family recipe. In the family recipe, it puts the water, milk, butter, and yeast for the sponge and then proceed. You add the milk and butter later. Does the order make a difference?
Yes, I think so. Fat (as in the milk and butter) slows the yeast activity in the dough. Maybe in your family recipe, the sponge is set aside for longer to rise.
i just placed these breads in the oven. this was an incredibly almost impossible dough to shape. i tried to measure as accurately as possible by spooning and leveling. i really felt uncomfortable adding more than the prescribed additional flour. can you add more detailed directions for the measuring?
Thanks for your feedback, Elisa. Sure I will be adding more detailed directions very shortly.
The dough was extremely wet, even after adding 2 tbsp more flour like recipe said – far more wet than it actually should have been. I even up having to add about extra cups of flour to the bread to get it to the right consistency. I started off baking for 10 minutes at 500 (mainly because I was already using the oven for something else), which gave it a beautiful golden brown color and then another 15 minutes at 350. Aside from having to adjust the flour quite a bit the bread was wonderful – was certainly a hit with all 3 of my picky teenagers.
Hi Cyn, I’m glad you enjoyed this Portuguese bread. This dough is meant to be sticky and can be tricky to work with. Did you check that your measurements were correct?
Hi can I use instant yeast?
Yes you can, Rita. Simple substitute 1:1 and proceed with the recipe as written.