
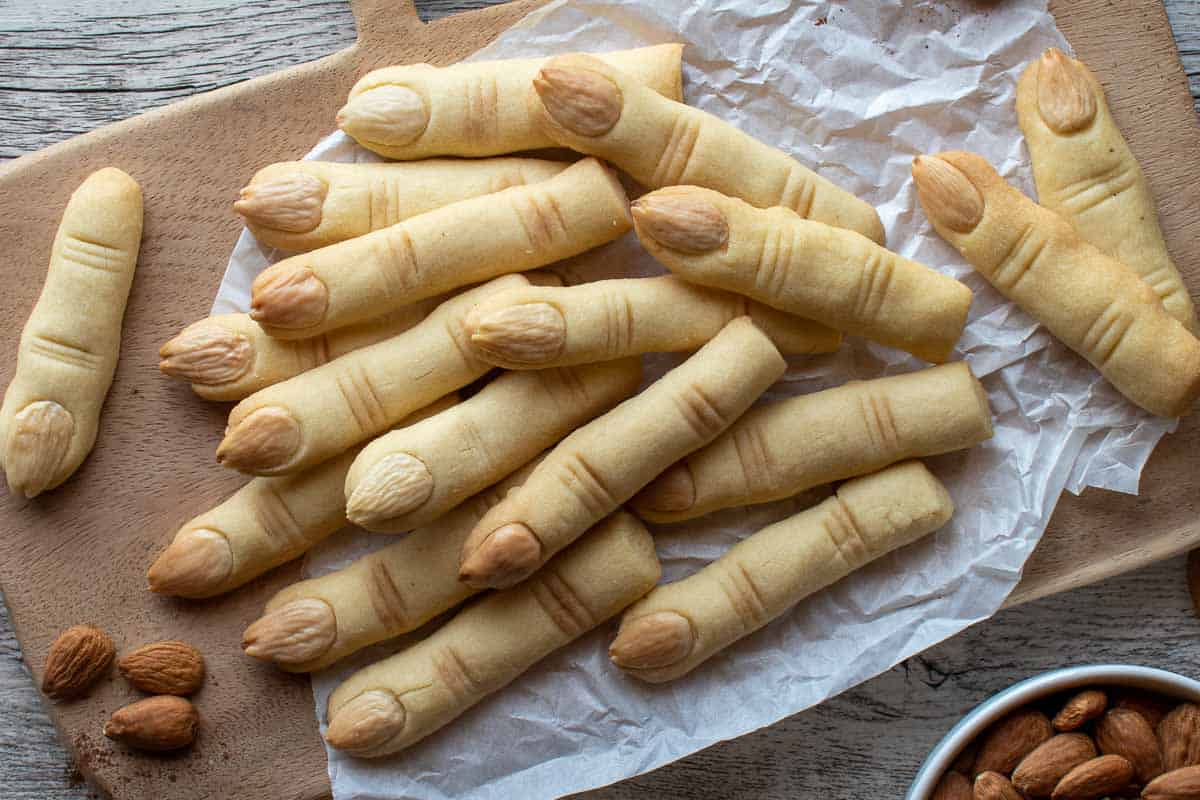
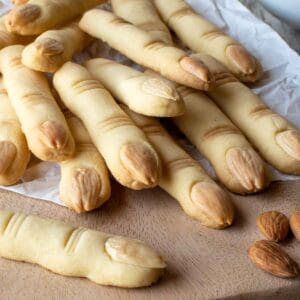
Witches Fingers

These Witches Fingers are so much fun and delicious
If you’re looking for an easy recipe to bring to a Halloween party, you can’t go past these witch finger cookies. Using just 4 (plus salt) simple ingredients, and following my clear steps, you’ll be creating a scene the minute you arrive…in a good way!

These fun Halloween cookies look scary but amazing, taste delicious, and are so simple to make. Plus you’ll have fun making them. Enlist the help of your children or grandchildren and you’ll all soon be giggling and having fun.
Witches Fingers are the perfect Halloween treat. Whether you have a party to attend or bake these just for fun, you’ll have a laugh plus a tasty cookie to enjoy!
Why you’ll love this recipe
- Easy and fast – Use a food processor to combine the ingredients for the dough in just minutes. Allocated time for chilling is essential but this is the ideal time to clean up and enjoy a cup of tea or coffee.
- Looks amazing – These Witches Fingers look scarily realistic which is perfect for a tasty Halloween treat. It’s simple to achieve the look and I explain it step by step in the recipe.
- Adaptable – The basic dough for these Witches Fingers can be adapted to suit your taste with added extracts and flavorings. As well you can also add coloring and vary the decorations.
For complete ingredient quantities and full instructions, please scroll to the printable recipe card at the bottom of the page.
Ingredients
Just like regular shortbread cookies, the ingredients as basic pantry staples.
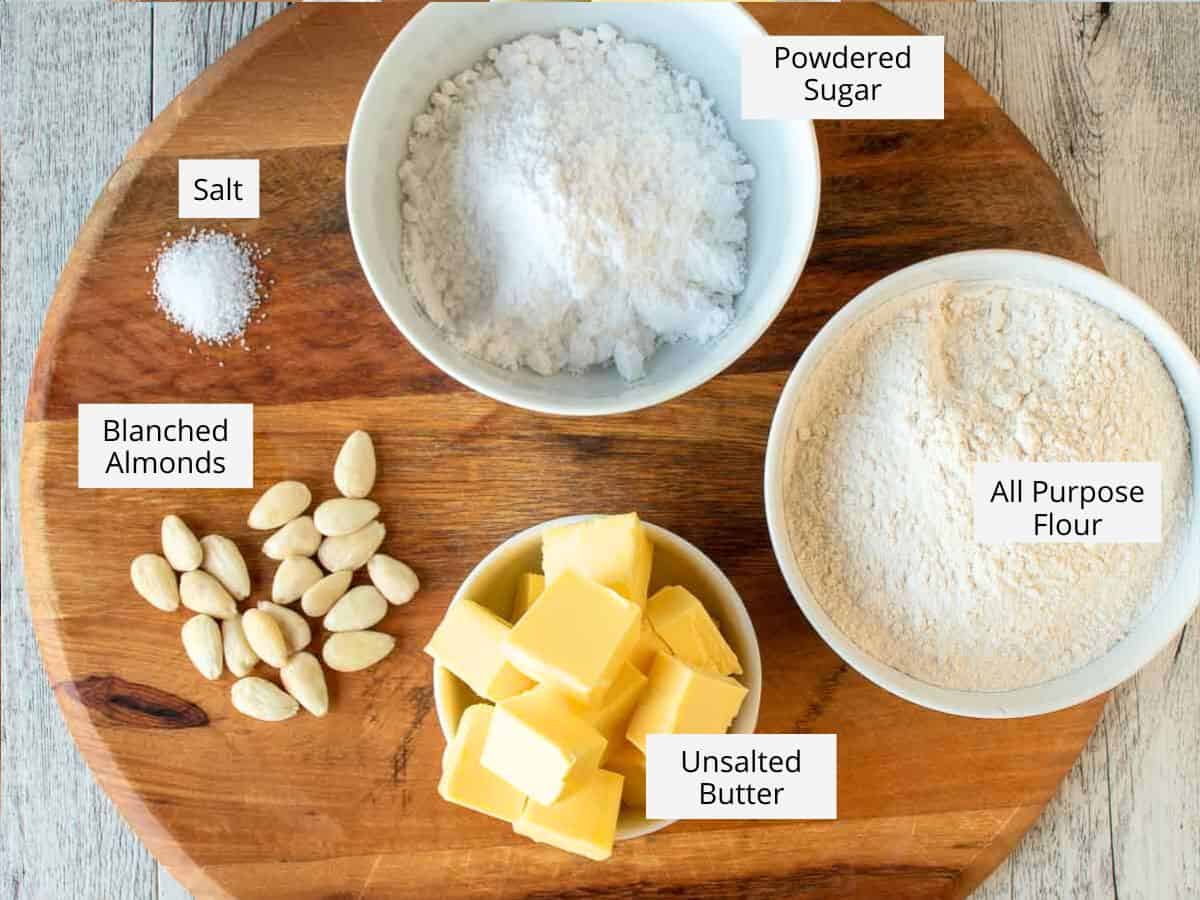
Flour – All purpose flour is used for this recipe. There is no baking powder needed. We don’t want these Witches Fingers to rise or spread too much.
Unsalted butter – for the best tasting cookies use good butter. Don’t substitute margarine or shortening; the results will not be tasty. I usually like unsalted butter for this recipe and include salt but use salted if that’s what you have and omit the added salt.
Powdered Sugar – This fine, powdery sugar dissolves quickly which is exactly what we need for this fast-to-make cookie recipe.
Blanched almonds – These are used to represent fingernails (and do a great job, I think!). Purchase blanched almonds or check out how to do that below. Use a fine knife to carefully split them in half where they naturally join.
Salt – Just a little enhances the flavor of these witches fingers!
Almonds are one of my favorite flavors and maybe yours too. Take a look at this Sbrisolona which is a traditional Italian torta or my gluten-free almond flour cookies that make the most of the wonderful flavors of almonds.
How to blanch almonds
Blanched almonds are simply almonds without the brown skins on the outside. If you don’t have any there’s no need to rush out to buy blanched almonds. It’s an easy process to do at home.
There are two methods. The one I use is to place the almonds in a small bowl and cover the almonds with boiling water from the kettle. Leave them for a few minutes then drain using a fine mesh strainer. You’ll notice that the skins will look wrinkled. Just press and slide the almonds out of their skins.
The second method is to bring a small saucepan of water to the boil. Tip in the almonds and boil for 60 seconds. Drain and slip the almonds out of their skins. You may need to rinse the almonds with cool water if they are too hot to touch. You’ll be surprised how the almonds pop out so easily!
Instructions
A recipe could never be easier than this one. There is no reason why you shouldn’t make these. Firstly these cookies are delicious and melt in your mouth. Secondly, Witches’ Fingers are super easy! Finally, what fun you can have with these cookies?
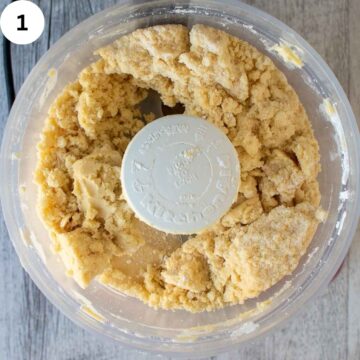
In the food processor, combine flour, butter, powdered sugar, and salt until the ingredients clump together.
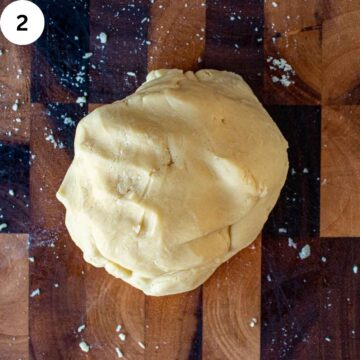
Scrape the dough out onto a work surface and gently press and knead until a smooth dough is formed. Wrap in plastic and chill.

Carefully split the blanched almonds by inserting a thin point knife at the natural slit in the almonds.
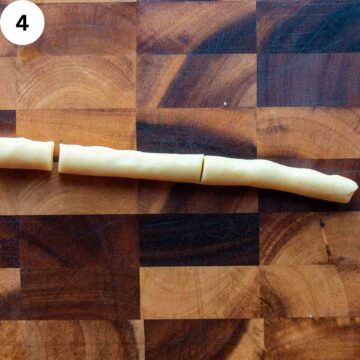
After the dough has chilled, take a small amount and roll a log that is about as thick as your finger. Cut into finger lengths.
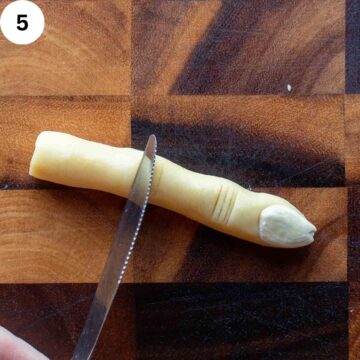
Mold the cut edge so that it is rounded, press a halved almond onto the end and use a knife to make slits to represent the wrinkles in the knuckles.
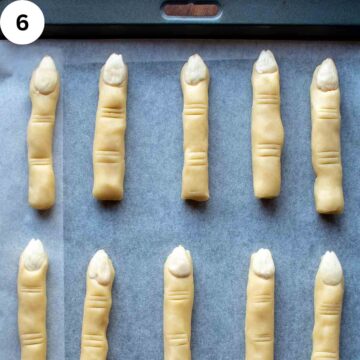
Arrange on a prepared baking sheet and bake for about 12 minutes until lightly golden.
Remove from the oven and allow to cool for 5 minutes before transferring to a wire rack to cool completely.
Hint: Take time and care when splitting the almonds with a sharp knife. Alternatively, leave the almond whole. The Witches Fingers will still look great!
Substitutions
- Unsalted Butter – instead of unsalted butter, use salted and omit the salt in the recipe
- Blanched Almonds – use packaged sliced almonds or pepitas instead.
- Almonds – instead of almonds use colored round candies like M&M’s for a less scary look.
Variations
- Flavored – add either 1 teaspoon of vanilla extract, ½ teaspoon of almond extract, or 1 teaspoon of finely grated lemon or orange zest.
- Colored – add a few drops of green food coloring when combining the dough in the food processor for even spooky witches fingers!
- Scarier – after baking, gently lift the almond off and pipe a little red decorating gel then replace the almond allowing the red gel to ooze out from under the nail. You can also use red candy melts or strawberry or raspberry jam for the same effect.
Storage
Store completely cooled Witches Fingers in an airtight container at room temperature for 5-7 days. If you have used a variation, such as adding red decorating gel, the keeping time may not be as long.
Tips for Success
- Be sure to have the butter at cool room temperature so that it blends easily with the other ingredients. Keep in mind that the dough won’t completely come together in the food processor and you will need to scrape it out to form the dough.
- You can still make this Witches Finger cookies recipe if you don’t have a food processor. Just place the softened butter into a large bowl. Add the all purpose flour, powdered sugar, and salt. Use a wooden spoon to combine all the ingredients until a dough begins to form. Turn out onto a work surface and knead gently to form a smooth dough.
- When forming the dough, don’t knead heavily as you would bread. This will result in tough cookies. Be gentle and knead just until a smooth dough is formed.
- The dough will spread just a little when baking so keep that in mind when shaping the cookies. Make them about the same or thinner than your fingers. Use your fingers as a guide when adding the knuckle marks.
FAQS
Absolutely! Shortbread is an easy cookie to make and shape This dough is so versatile and can be shaped however you desire. This recipe is not limited to Halloween. Roll balls, and flatten with a fork to enjoy these cookies throughout the year.
Yes, make the dough the day before, wrap it in plastic, and store it in the fridge overnight. The dough may need to sit out at room temperature for 20 minutes or so before you can shape it easily.
The dough can also be frozen for up to one month. Wrap in plastic then put it into a ziplock bag before freezing. Thaw in the fridge.
No, many other cookie dough recipes will spread too much which won’t have the same effect. Possibly my Snowflake Cookie dough would work but I haven’t tried it.
Serving Suggestions
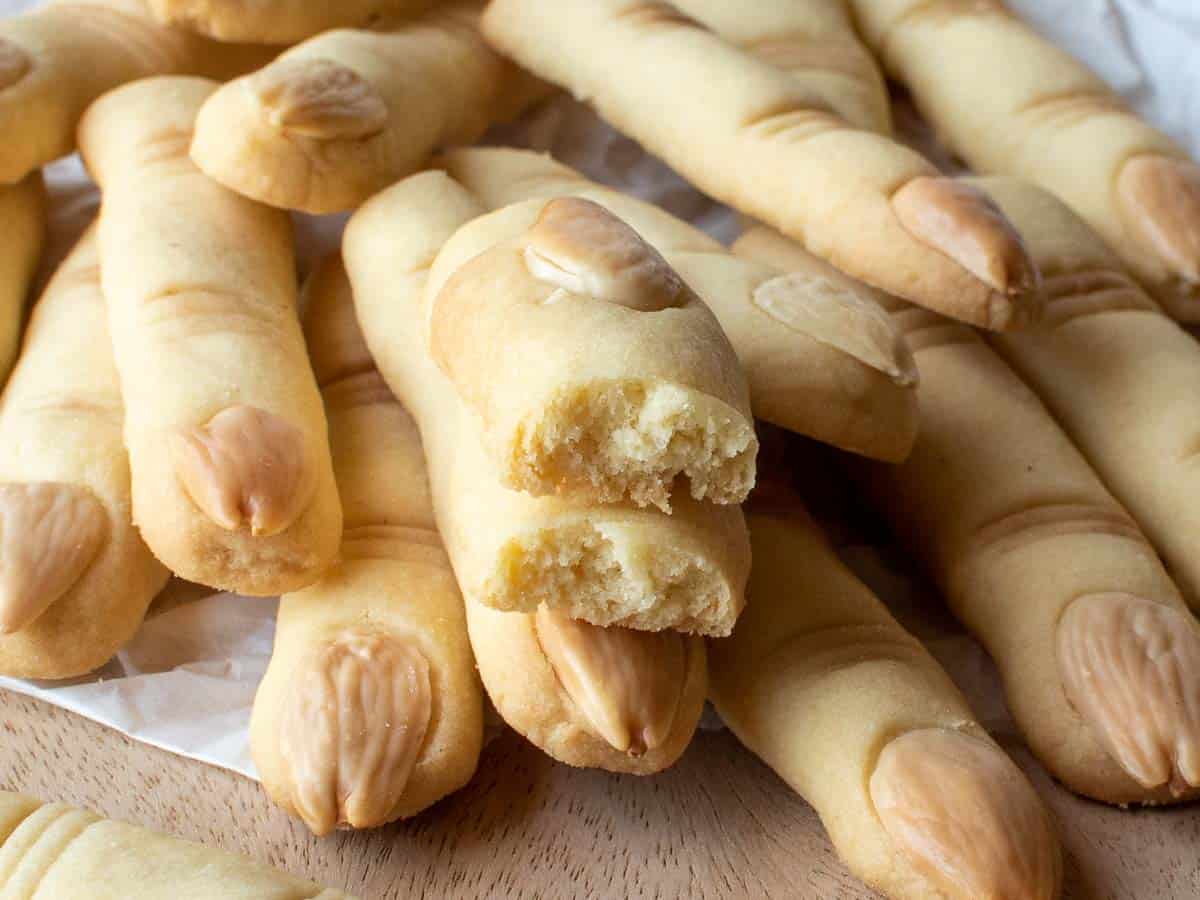
Witches Fingers are fun Halloween treats that everyone will love, so be sure to make enough. The halved almond adds a delicious taste and texture to this melt-in-your-mouth cookie. Serve these with an Italian hot chocolate or Budino al Cioccolato to dip into.
Made this recipe?
Please let me know if you liked it by leaving a ★★★★★ star rating and a review below. And remember to subscribe to my newsletter – it’s free!
Witches Fingers Recipe
Ingredients
- 3 cups all purpose flour 375 grams (See Note 1)
- 1 cup powdered sugar 110 grams
- 1 cup unsalted butter (softened) 2 sticks/240 grams
- ½ teaspoons salt
- 20 blanched almonds for decorating
Instructions
- In a food processor, put the all purpose flour, powdered sugar, unsalted butter and salt. Process until it all comes together.
- Scrape the dough out onto a work surface. Gently press and knead the crumbly mixture to form a smooth dough.
- Flattened the dough into a disk. Wrap in plastic and refrigerate for 1 hour.
- While the dough is chilling, use a small pointed knife to halves the almonds. Gently push the point into the rounded end of the almond where you can see that the two halves are split. Wiggle the knife a little until the almond splits in half. There may be some that don't work out so have more almonds on standby.
- Preheat oven 320ºF/160º and line two large baking sheets with non-stick parchment paper.
- I let the dough soften a bit before I could form my shapes.
- Cut off a small portion of dough and rolling a log the size of your finger. Cut into finger lengths.
- Shape the end of each finger so that it is a little rounded. Press a split almond on the end to represent finger nails. Then use a knife to press three lines to mark the knuckles. Make one set of three closer to the fingernail and then another further along. Use your fingers as a guide.
- Place witches fingers onto prepared cookie sheet and bake for 12- 15 minutes or until lightly colored.
- Cool for 5 minutes on the cookie sheet then transfer to a wire rack to cool completely.
Notes
- Be sure to measure the flour correctly by stirring to loosen the flour first, then spoon into the measuring cup. Or use scales for accuracy!
- Have the butter softened and at cool room temperature.
- If you don’t have a food processor, use a bowl and a spoon to combine the butter, flour, powdered sugar and salt.
- Crumbly dough that doesn’t stick together is the result of too much flour (See Note 1). To fix crumbly dough, add in a tablespoon or two of softened butter.
- Be gentle when you knead the dough. Knead only until the dough is smooth.
- Make the fingers thin keeping in mind that the dough will spread a little.
Nutritional Estimate Per Serving
Nutritional Disclaimer
Nutritional information is an estimate provided by an online nutrition calculator. For accurate results, it is recommended that the nutritional information be calculated based on the ingredients and brands you use.
This updated recipe was first published on 31 October 2011
These were a big hit – I “painted” the fingernails with red food color and added a little green color to the dough before shaping.
Oooh that sounds super spooky! I love your additions, Melinda!
The best Halloween biscuits around! Old and young love them, so easy to make too. Thank you!
Yes, I agree!!
Halloween is not celebrated in my country so I always enjoy watching themed recipes on my favourite food blogs during that time 🙂 And you're no exception! I love your cute fingers maybe even more than the scary fingers (which are perfect, too!). Happy Halloween sounds great and funny 😀
The witches fingers look amazing! So life like – they'd scare me!
What a fantastic and festive treat! Totally love it! :))I hope you had a wonderful holiday!xoxo,Tammy
I love playing with witches fingers – your are especially spooky. Wonderfully spooky! And ghoulishly delicious!
Marcellina ma che belle le tue dita!!!!!!!!! Complimenti cara e buon Halloween!
Marcy sono bellissime!!!! Devo assolutamente provare a farle!