
Semolina Bread

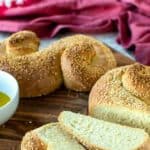
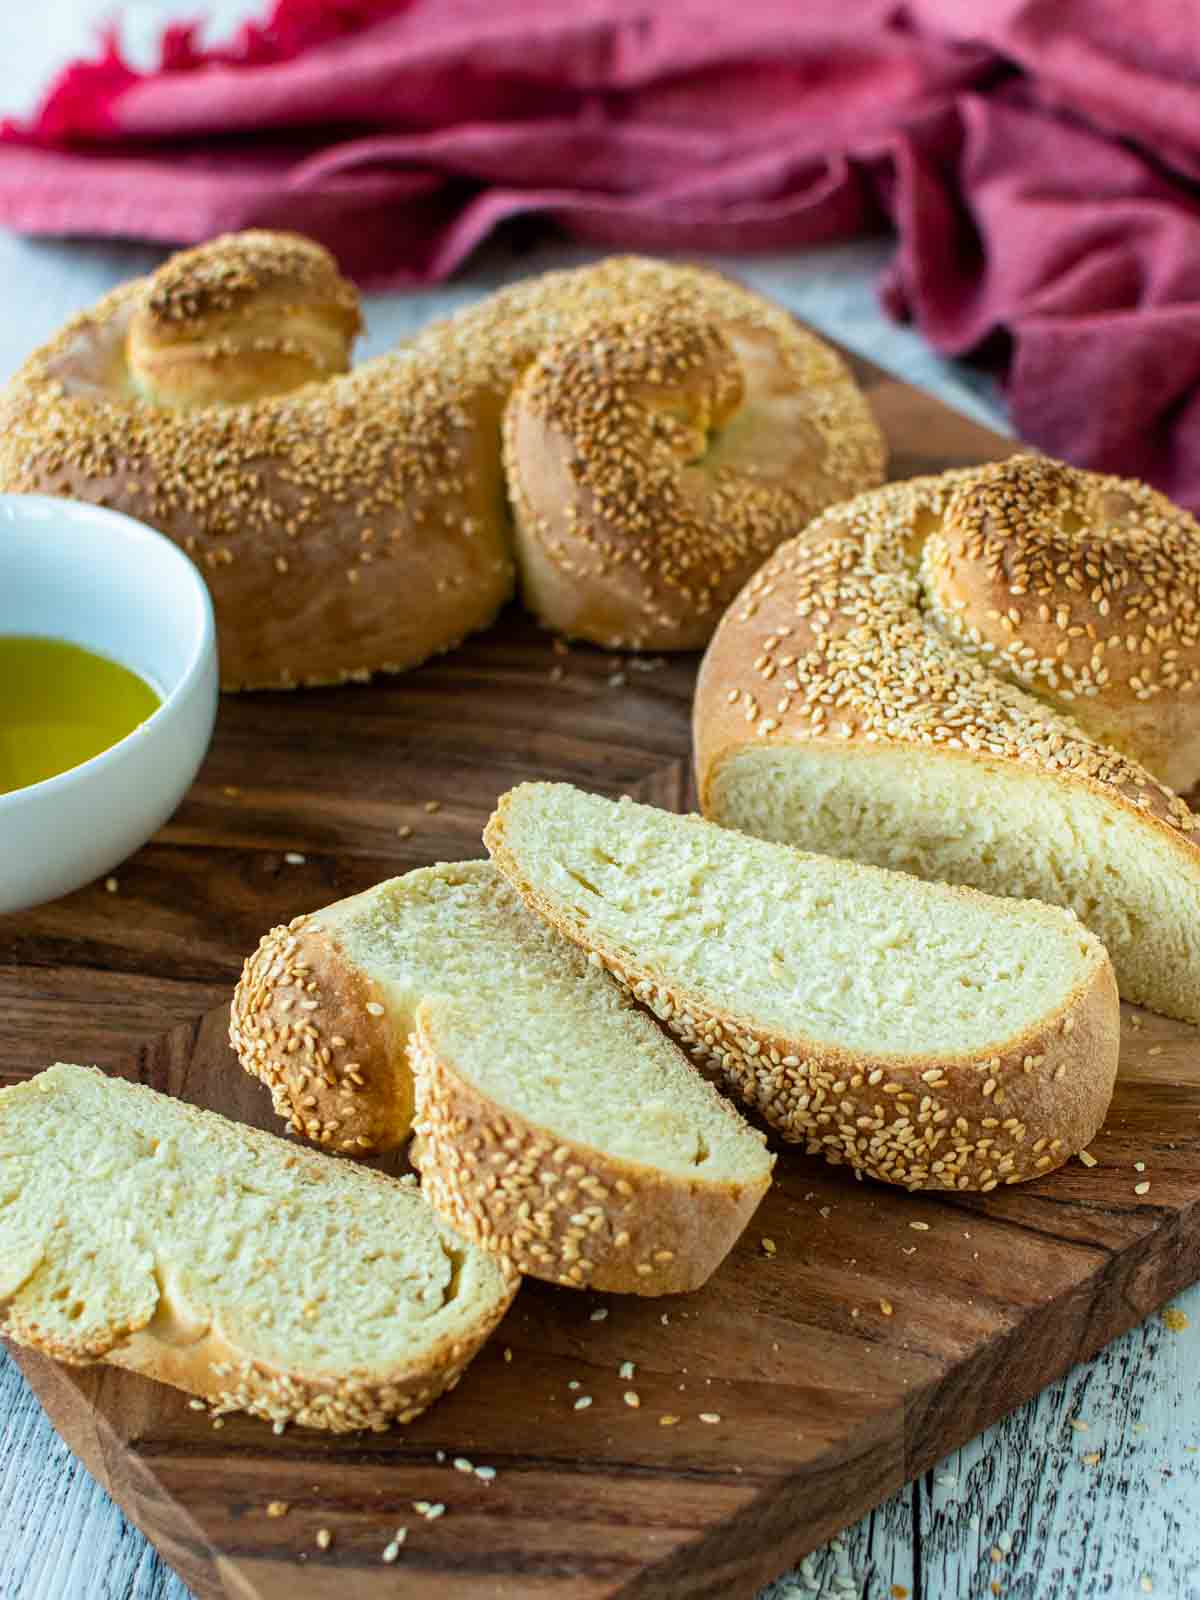
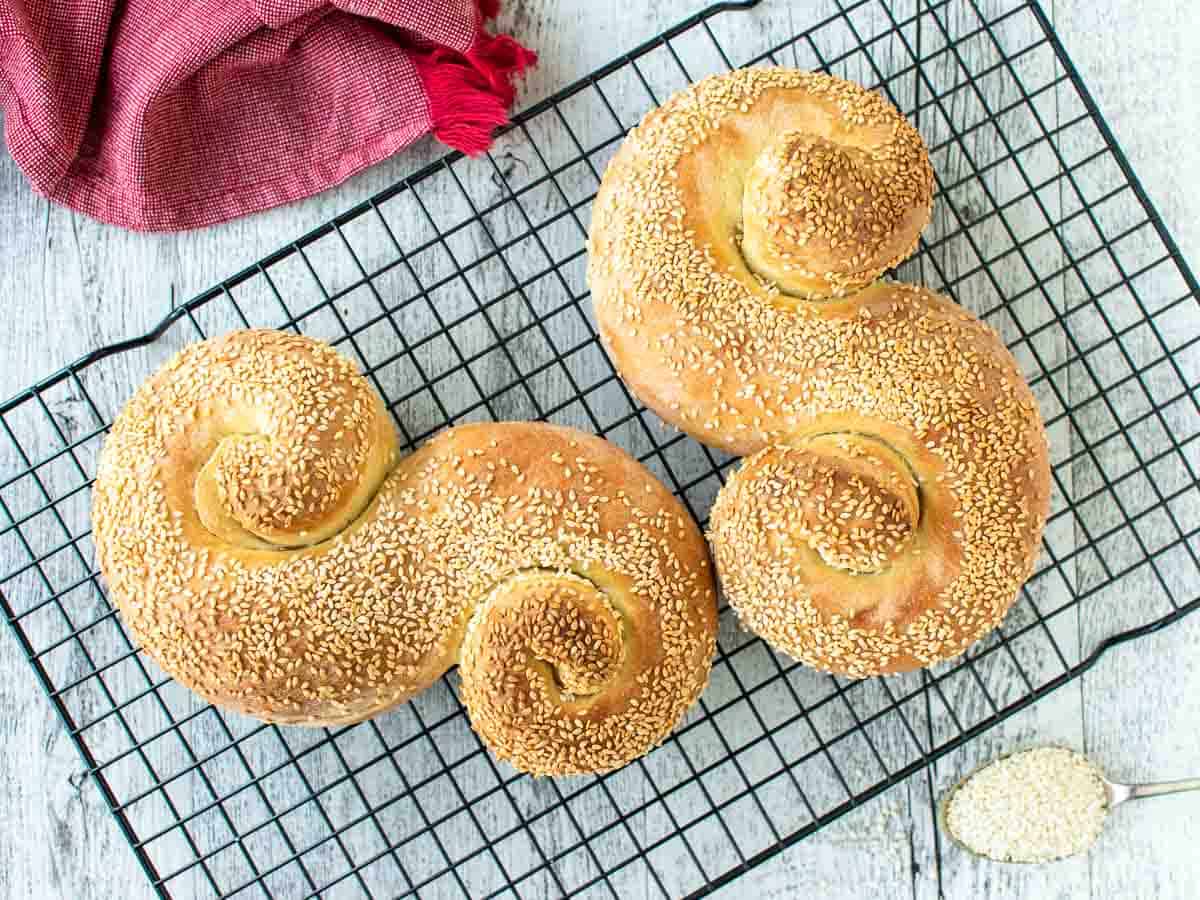
This classic Sicilian Semolina Bread is golden and fragrant with a crunchy crust covered in sesame seeds.
Known as Pane Siciliano, it’s easy to make and goes perfectly with salami, sausages, and Italian cheeses. This bread is so good that you’ll devour it slice after slice!!
The main ingredient in this bread is semolina flour. It’s not the coarse semolina used to make polenta or gnocchi alla romana. But fine semolina milled from hard durum wheat and golden in color.
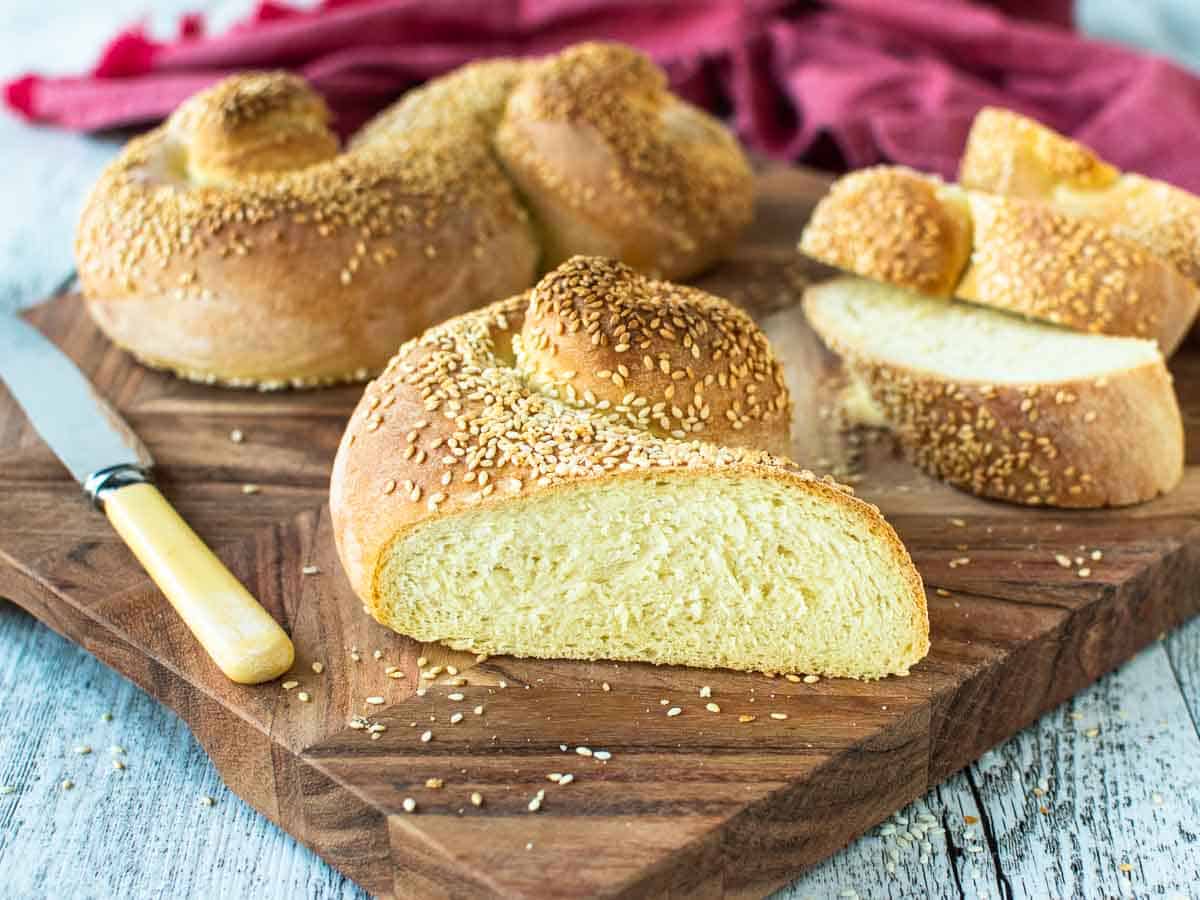
My rustic Semolina Bread is a little bit dense while still soft and flavorful. It’s this texture that makes it pair so well with the strong flavors of southern Italy. Imagine this bread, still warm from the oven, split in half, drizzled with extra virgin olive oil, a pinch of salt, oregano, and a few strips of anchovies. That is bliss!
Semolina Bread is traditionally formed in many different shapes in bakeries all over the beautiful island of Sicily. The most common shape is called mafalda and looks a bit like the letter “M” squashed together with a baton of dough across the top. The shape I’ve chosen is called occhi, which means eyes, and it’s a reference to the eyes of St Lucy, who is the patron saint of vision. As you can see, this shape looks a little bit like eyeglasses.
Why you’ll love this recipe:-
- Semolina flour gives this bread a stunning golden color, a crunchy crust, and an almost buttery taste.
- The thick topping of sesame seeds is more than just for looks; they add a nutty flavor to the bread that’s unbeatable!
- This bread is not hard to make; it just takes time and patience.
- It’s a versatile bread that is amazing fresh and warm from the oven, but toasting day-old slices brings out all the fresh flavors of a just-baked loaf.
For complete ingredient quantities and full instructions, please scroll to the printable recipe card at the bottom of the page.
Ingredients
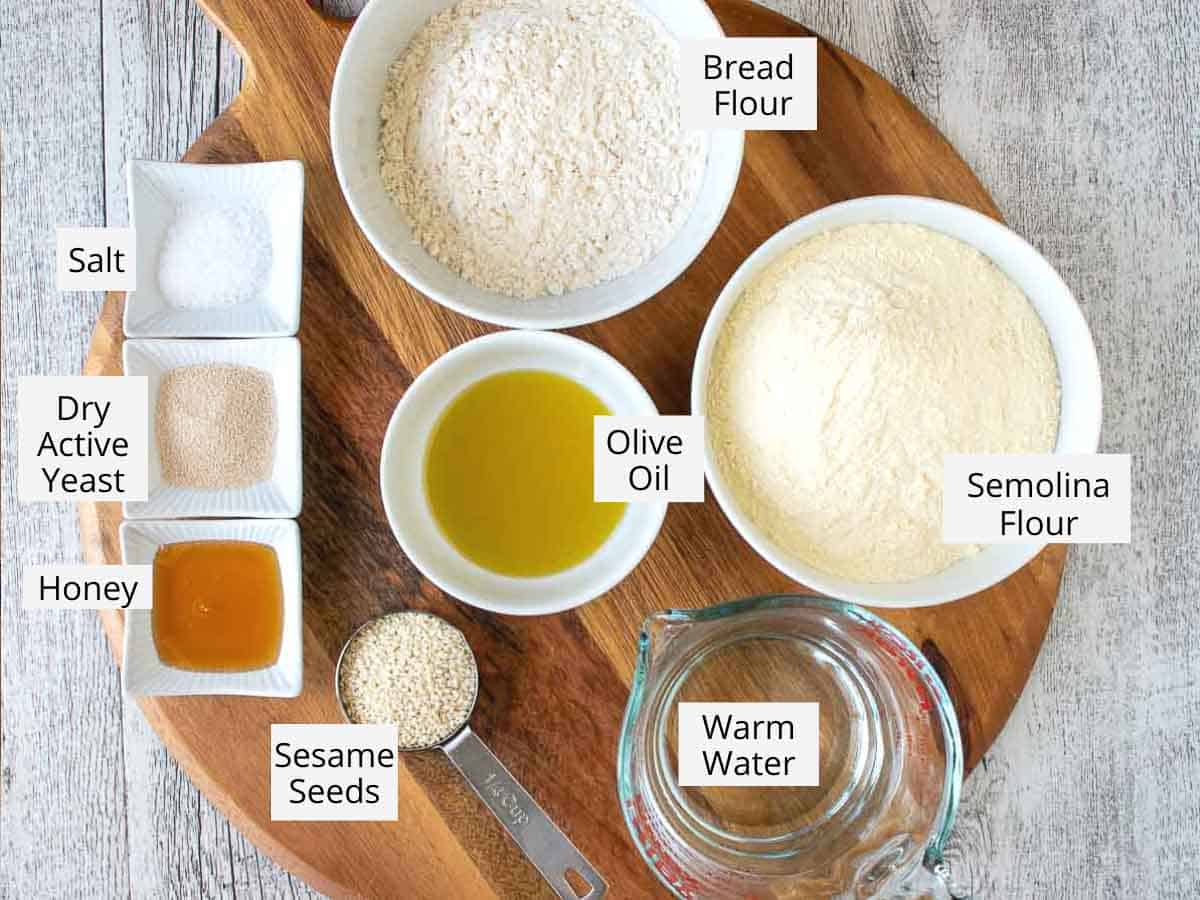
- Active dry yeast – easily available at most supermarkets and very easy to use. This yeast usually comes in premeasured sachets, which is very convenient.
- Lukewarm water – just warm, not hot. If the water is too hot, it will kill the yeast. You should be able to put your fingers into the water and feel neither hot nor cold. It’s at body temperature.
- Honey – I like the flavor of a little honey, which also gives the yeast something to feed on right at the beginning.
- Olive oil – regular olive oil or extra virgin olive oil is perfect for this recipe.
- Semolina flour – is finely ground from hard durum wheat, and it’s fantastic for pasta like cavatelli. The pale yellow color is characteristic of durum wheat semolina. Don’t use coarse semolina because it won’t work. Take it from me – I’ve tried!
- Bread flour – this flour is higher in protein and gives great structure in bread dough. At a pinch, you could use all-purpose flour.
- Salt – sea salt is great, but whatever salt you’ve got will be fine. Salt is so important when baking with yeast. It slows the yeast a little, ensuring that the yeast doesn’t eat up all the sugars in the dough. I know fast rising might sound like a good idea, but dough made without salt ends up sticky, hard to work with, and often collapses.
- Sesame seeds – these are the essential characteristic of this Sicilian Semolina Bread and add a delicious nutty flavor. You’ll find these in most grocery stores.
See the recipe card for quantities.
Instructions
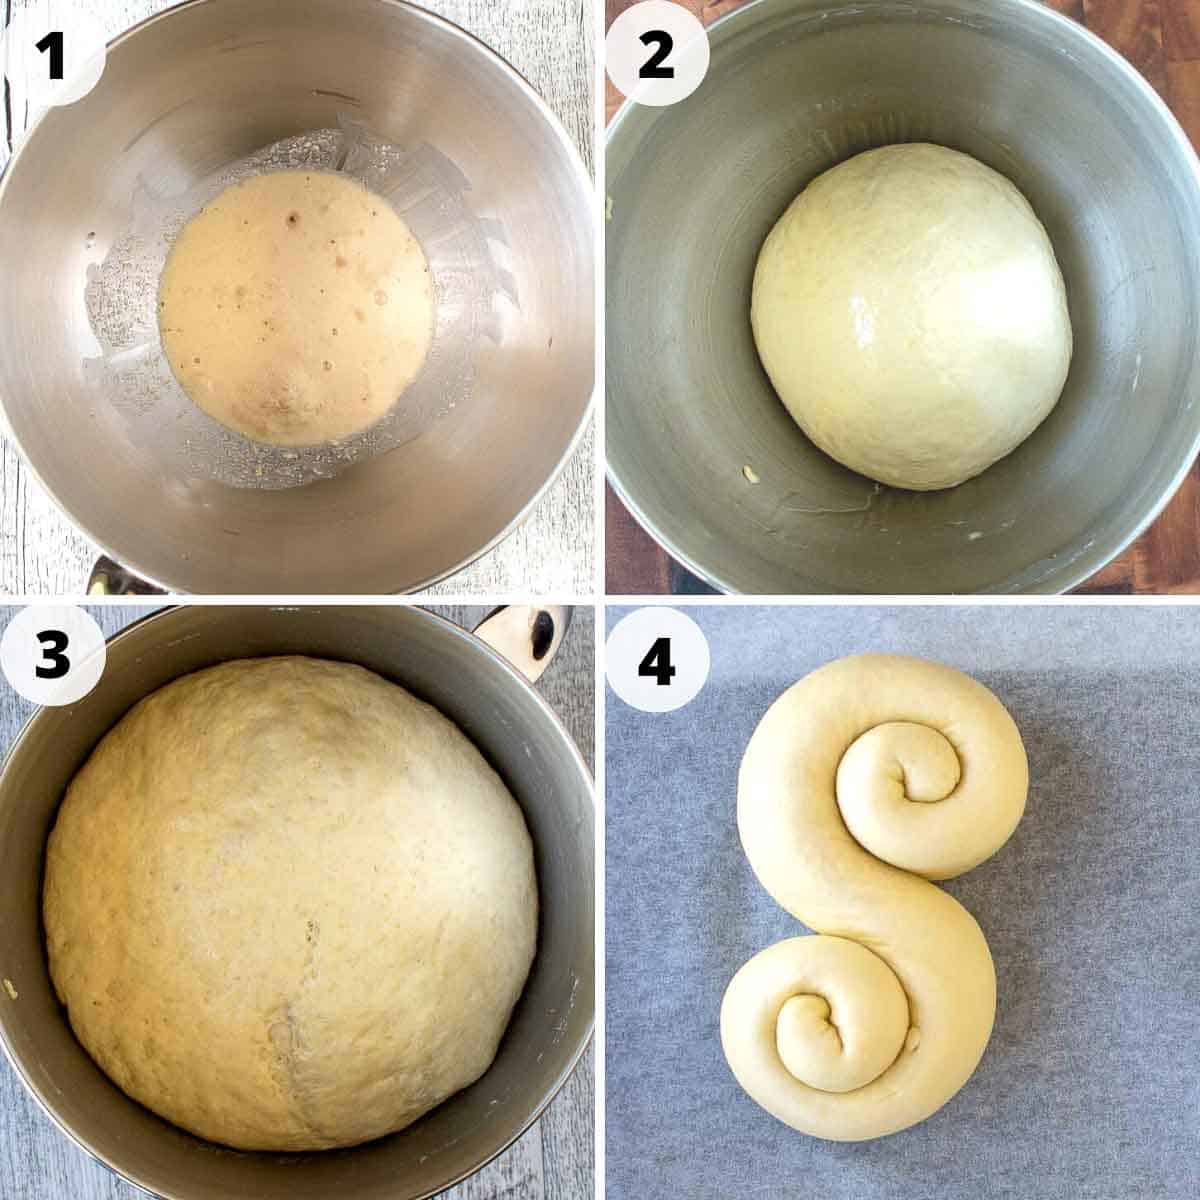
- Combine active dry yeast, honey, and warm water in a large stand mixer bowl. Let it stand for 5 minutes until frothy about 5 minutes.
- Using the dough hook on a stand mixer, knead together the yeast mixture with all of the ingredients except the sesame seeds. When well kneaded, remove the dough from the bowl and finish by hand, forming it into a ball. Return it to the bowl.
- Cover with plastic wrap and allow to rise in a warm place until doubled.
- When doubled in size, scrape the dough out onto a lightly oiled surface and divide it in half. Form each half into a long rope and coil the ends in opposite directions like an S. Continue to coil both ends back towards the middle until completely coiled.
Transfer the shaped dough to the prepared baking sheet, brush with water, and sprinkle thickly with sesame seeds.
Allow to rise in a warm place, then bake in a preheated oven until golden brown.
Hint: When preheating the oven, place a large baking pan underneath the rack on which you will bake the bread. Pour a cup of water into the hot baking pan just as you put the semolina bread in to bake. The steam created stops the crust from hardening too quickly and allows the bread to rise well. Remove the baking pan of water after 15 minutes. The loaf needs to finish cooking in a dry oven.
Substitutions
- Active dry yeast – instant yeast can easily be substituted for active dry yeast. Use about 25% less – for 2 ¼ teaspoons of active dry yeast, use 1 ¾ teaspoons of instant yeast. If you have access to fresh yeast and would like to use it, substitute approximately ⅔ ounce or 20 grams of fresh yeast for the active dry yeast.
- Honey – replace with sugar if you prefer or don’t have honey.
- Sesame seeds – while sesame seeds are the traditional topping for this bread, these can be omitted or substituted with poppy seeds.
Variations
- Cheesy – add ¼ cup finely grated Parmesan (Parmigiano Reggiano cheese) into the dough for a cheese-flavored bread.
- Spicy – add chili pepper flakes into the dough for a little heat in this homemade Italian bread.
Use this Italian Semolina bread instead of ciabatta bread to make my tasty garlic bread recipe!
Equipment
Using a stand mixer with a dough hook attachment takes the work out of kneading this bread. However, if you don’t have a stand mixer ,this dough can be kneaded by hand quite easily.
Storage
While this bread is best eaten fresh the day of baking, it will keep for a day or two in a sealed bag or air-tight container. Day-old Semolina bread is delicious toasted and topped with sun-dried tomato pesto!
Alternatively, this bread freezes well. Just wrap in two layers of plastic wrap and pop into a heavy-duty, zip-lock bag. Freeze for up to one month. Thaw at room temperature and reheat in the oven until crispy on the outside and warmed throughout.
Tips for Success
When baking with yeast, always ensure you have fresh yeast. When combined with the warm water and honey, it should become foamy in just 5 minutes or so. If not, get yourself new yeast!
Seeing as this is Semolina Bread, the semolina flour is very important. Be sure to purchase the finely milled variety. It’s the same as the one I used in my busiate pasta recipe. Some semolina is coarser and won’t work in this recipe.
Preferably weigh ingredients on kitchen scales to get the correct ratio. However, if you use cups, always stir the flour to lighten before spooning it into the cups, measuring, and leveling off.
Always allow the dry ingredients to mix well with the wet ingredients before deciding that the dough is too dry. It takes time for the moisture to be absorbed into the flour. After the dough has been well kneaded, you can then decide if it needs more water.
Don’t skip brushing the final dough with water before baking. This is what makes the sesame seeds stick really well.
FAQ
This semolina bread recipe uses olive oil and not butter, so it’s definitely vegan.
Yes, in many ways, semolina bread is better than white bread. It tastes delicious and has more fibre and protein than white bread. The health benefits of semolina flour include being high in minerals and B vitamins, plus it’s known for being good for your digestive system. Semolina flour used in semolina bread is less refined than white flour. However, it is high in gluten, which may not be tolerated by some people.
Semolina flour has a long expiry date if it’s stored in a cool, dry place. So the answer to this question is that it depends. It depends on whether your pantry is always cool and dry; then it’ll be fine at room temperature until the expiry date on the package.
If instead you’re like me, live in a hot, humid climate, then the refrigerator or the freezer is the best place for semolina flour. I like to transfer semolina flour into an airtight container before storing it in the fridge or freezer.
Serving Suggestions
Semolina Bread is absolutely divine warm from the oven.
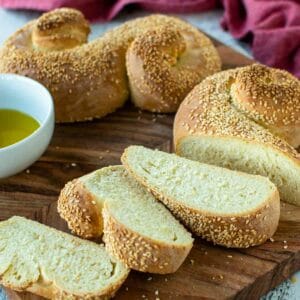
But if you want to take this bread to a whole new level, then you’ll follow this tip. While still warm, split it in half, drizzle the bread with extra virgin olive oil, add a sprinkle of salt and dried oregano, then lay on strips of anchovies. Add a pinch of chili flakes if you like.
Eat it warm. You’ll thank me for it!
Made this recipe?
Please let me know if you liked it by leaving a ★★★★★ star rating and a review below. And remember to subscribe to my newsletter – it’s free!
Semolina Bread Recipe
Equipment
- 1 electric stand mixer with dough hook
Ingredients
- 2 ¼ teaspoons (7 grams) active dry yeast
- 1¼ cup lukewarm water divided (in dry weather 1⅓ cups of warm water)
- 2 teaspoons honey
- 1 tablespoon olive oil
- 2 ½ cups semolina flour 360 grams
- 1 cup bread flour 130 grams
- 2 teaspoons salt
- 2 tablespoons sesame seeds
Instructions
- Combine active dry yeast, honey and ¼ cup lukewarm water in a large stand mixer bowl. Let it stand for 5 minutes until frothy.
- Attach the dough hook to the stand mixer.
- Add the olive oil, remaining 1 cup lukewarm water, semolina flour, bread flour and salt into the frothy yeast mixture.
- Begin mixing on low speed until all ingredients are combined.
- Increase speed to medium and knead for 4-5 minutes until the dough is elastic, smooth, and forms a soft ball that sticks to the bottom of the bowl. The weather can greatly affect bread dough. If it's humid, you may need an extra pinch of bread flour. If the weather is dry, you may need a little more warm water.
- Remove the dough from the bowl and finish kneading by hand on an unfloured surface. Use a bench scraper to lift the dough off the surface as needed. When the dough is springy and strong, form into a ball.
- Wash out the bowl and lightly oil with olive oil. Place the dough into the bowl, cover with plastic wrap and allow to rise for 1 ½ hours in a warm place.
- When risen, scrape the dough out onto a lightly oiled surface.
- Cut the dough in half.
- Flatten each half into a long rectangle then roll up like a Swiss roll. You'll have two fat logs of dough.
- Take one log and with the palms of your hands, roll the dough into a long rope 24 inches (about 60 cm) long.
- Tightly begin coiling the ends in opposite directions like an "S". Continue to coil both ends back towards the middle until completely coiled.
- Repeat with the remaining dough.
- Carefully transfer the coiled onto the baking sheet lined with non stick parchment paper
- Brush with water and sprinkle thickly with sesame seeds. Pat the sesame seeds on so they stick well.
- Cover the dough loosely with plastic wrap and allow to rise in a warm spot for 30-40 minutes until puffed and risen or doubled in size.
- In the meantime preheat the oven to 400ºF/200ºC and place a deep baking pan inside the oven underneath the rack that you will be baking the bread on.
- When the dough is puffed and risen transfer it to the oven. At the same time, carefully pour one cup of water into the preheated baking pan.
- Bake for 15 minutes then remove the baking pan of water after 15 minutes. The loaf needs to finish cooking in a dry oven.
- Bake for a further 15-20 minutes until golden brown.
Notes
- Use fresh yeast. Check the date on the packet of yeast.
- Use fine-milled semolina flour.
- Preferably weigh ingredients. If using cup measurements, stir the flour up to lighten, then spoon into the cup measure without packing.
- Mix the dough well and give it time for all the water to be absorbed into the flour before making any adjustments.
- Be sure to brush the final dough with water before baking so that the sesame seeds stick well.
Nutritional Estimate Per Serving
Nutritional Disclaimer
Nutritional information is an estimate provided by an online nutrition calculator. For accurate results, it is recommended that the nutritional information be calculated based on the ingredients and brands you use.


This bread is ABSOLUTELY fantastic. Semolina bread is my favorite, and this is the best one I’ve ever had. We cut the S in half and used the rounds for sandwiches — it was delicious… We are making more tomorrow. Thank you so much for this perfect recipe!
Thanks so much for the great feedback! I’m really glad you enjoyed the bread and using the rounds makes delicious sandwiches. Enjoy making your next batch!