English Scones Recipe
This is the best English Scones Recipe I have ever tried and I want to share it with you.
With this recipe you can make light and fluffy scones every time!

Table of Contents
Why you’ll love this recipe
If you want a baking recipe with tips and hints, you’ll find lots here on Marcellina in Cucina. There’s recipes for a quick chocolate cake, an easy vanilla cake or AMAZING chocolate chip cookies and exactly how to make biscotti. And here you’ll find the best English scones recipe with all my tips for success.
Scones are such a classic Australian treat. Everyone loves them. Whether you like you scones with strawberry jam and cream or with honey or just dipped into your tea. A light, tender scone is always appreciated and enjoyed by everyone.
Quite a few years ago I visited Tasmania and enjoyed Devonshire Tea every afternoon. I marveled at the bakers in the tea houses who made fresh, delicious scones all day, every day. I wanted to make great English scones too!
Then I found this English scones recipe and copied it by hand into my little red recipe book. Now I want to share with you what I have discovered.
Ingredient notes
I’ve tried lots of different easy scones recipes. From recipes with lemonade and cream to recipes containing eggs but I have found this very basic recipe is the best English Scones Recipe ever! Why? Because it is light and fluffy, quick to make and never fails. The best part is that the ingredients are pantry staples.
- self raising flour
- salt
- butter
- milk
Variations
This is a basic English scones recipe. A soft and easy scones recipe but a basic one which means you can add extra flavorings that you may like.
- a spoonful of sugar.
- a handful of dried fruit.
- grated rind of an orange or lemon.
- a teaspoon of spice like cinnamon.
- chopped walnuts or other nut that you like.
- chocolate chips – white or dark.
- spoon the batter onto hot, stewed fruit and bake to make a delicious cobbler.
- cheese and herbs for a savory scone.
- sun dried tomato with olives and cheese.
- substitute gluten free flour for a gluten free scone.
Instructions
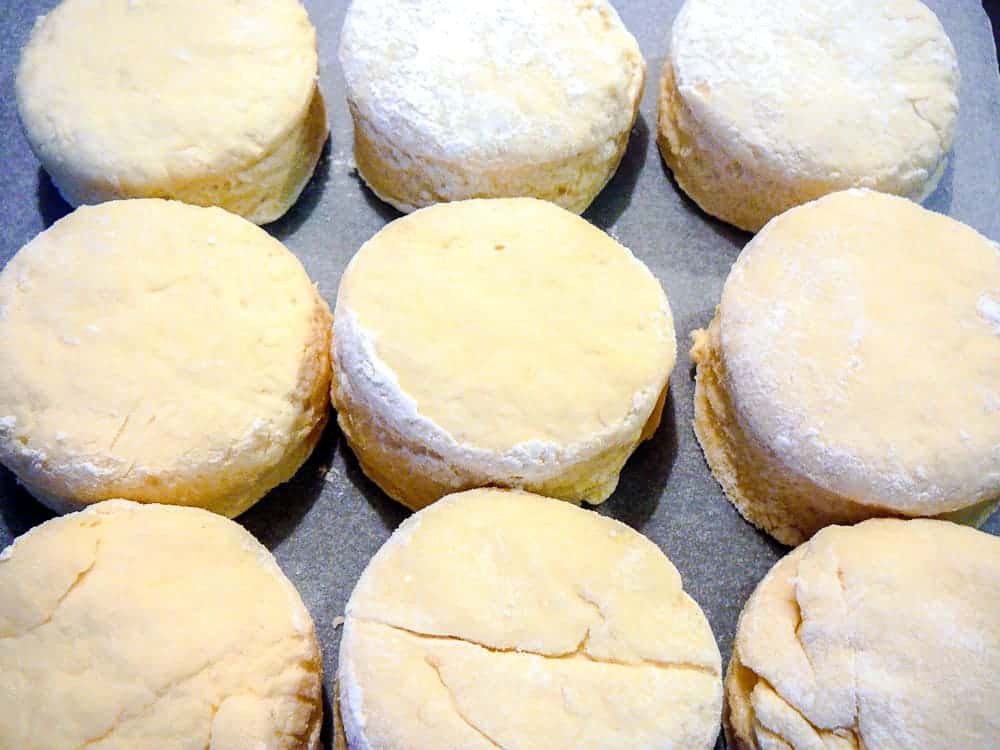
- Preheat the oven
- Rub the cold butter into the flour and salt
- Add the cold milk all at once
- Combine into a dough and pat out onto floured board
- Cut out scones
- Place on baking sheet and bake in a hot oven
Tips for success
Really, it’s quite simple. Here are the 8 secrets I have learnt over the years to make great English scones.
- Preheat the oven to a very hot temperature – 230°C/450°F
- Start with cold ingredients and keep everything cold.
- Grate the cold (even frozen) butter into the flour and rub in but leave little “pebbles” of butter for extra flakiness
- Add the cold milk all at once and mix quick with the blade of a dinner knife.
- Turn out on a VERY lightly floured board and knead briefly…by that I mean count quickly to 30 and stop.
- Resist adding more flour – this dough is meant to be sticky.
- Use a floured cutter and DON’T twist the cutter. Simply press down to cut. (Hint: use a floured glass if you don’t have a scone cutter)
- As soon as the scones come out of the oven wrap in a clean tea towel to retain the moisture.
FAQ’s
As with any scones, it is really best if they are eat warm from the oven. And, I mean, who could resist that? But, even though this is the best English scones recipe ever, you may have a few left over.
You can keep the scones in air tight container for the next day but warm in the microwave before splitting and topping with jam and cream.
However, it is best to FREEZE any leftover scones so that they don’t dry out. I like to wrap each one individually in plastic wrap then pop all of them into a zip lock bag.
To defrost, simply remove the plastic wrap and defrost for 20 seconds in the microwave, turning over halfway through. Is it like a fresh scone? No, nothing beats a freshly baked scones but at a pinch, I think it’s fine.
You can make your own quite easily! It takes just two ingredients – plain or all purpose flour and baking powder. Just remember that different brands of baking powder perform differently. So it is adviseable to check the instruction on the box of baking powder you are using.
In Australia to make self raising flour you will need 2 teaspoons of baking powder to each cup of plain flour. However in the United States, you will only need 1 1/4 teaspoons of baking powder per cup of plain (all purpose) flour. In other countries, please check your brand of baking powder.
Serving suggestions
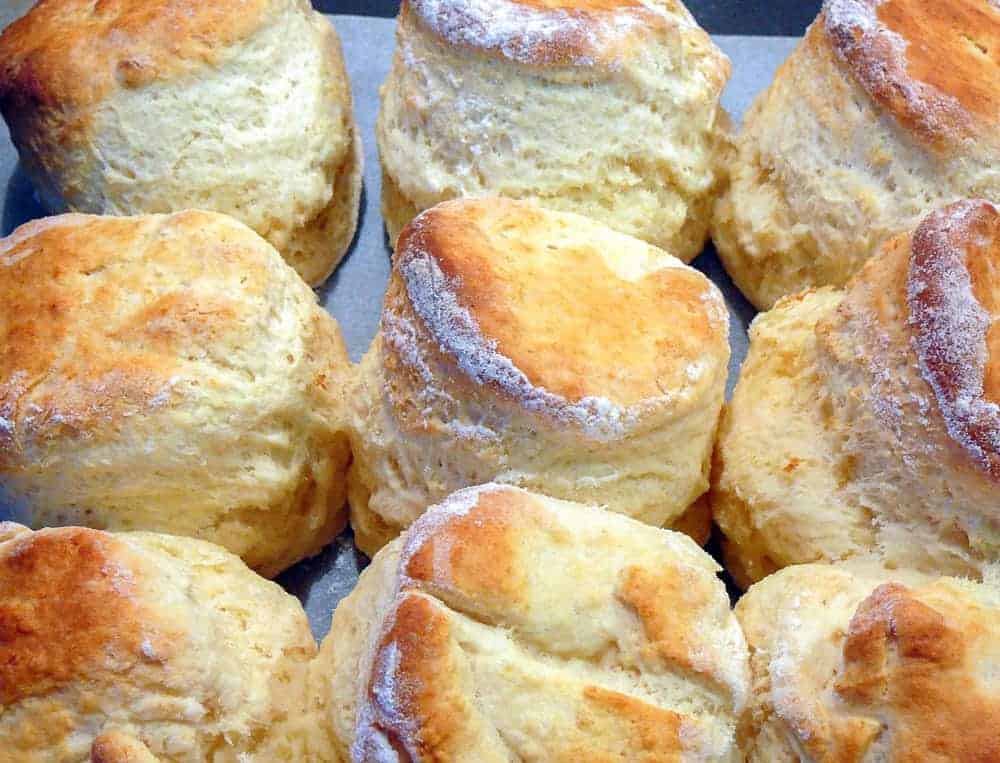
These English Scones should be eaten warm from the oven. Split the scone in half and you can melt butter onto the scone before slathering on some lovely, thick jam.
I’m a classic girl and love eating scones with my strawberry jam recipe (you really should try it) and fresh cream. However the list is endless. Any spread is good on English scones – honey, golden syrup, maple syrup or even just really good butter. Little people love chocolate spread on their scones.
More recipes
Damper with olives, sun dried tomatoes and cheese
Pumpkin Scones
Mascarpone Cream
What readers are saying
“This is the first time I’ve ever made scones that rise! I’ve been trying for years. Thank you. This recipe really works for me. Made some date ones and plain. Your tips are what I’ve needed all this time.”
“Easiest and most delicious scone that can be prepared in half an hour. Very impressed.”
Made this recipe?
Let me know if you liked it by leaving a ★★★★★ star rating and a review below. Don’t forget to subscribe to my newsletter – it’s free!

English Scones
Ingredients
- 3 cups self raising flour See note 1
- pinch standard fine table salt See note 2
- 2 ounces (4 tablespoons or 60grams) salted butter
- 1 ¼ cups milk plus extra to brush scones before baking
Instructions
- Heat the oven to 450°F/230ºC.
- Measure the flour by first giving it a stir to lighten then spoon the flour into measuring cups.
- Sift flour and salt into a bowl and rub in the butter until the mixture resembles fine breadcrumbs. It's if some of the butter is not completely rubbed in. Leave little pebbles of butter.
- Stir in the milk with a flat bladed knife. Depending on the weather and your flour you may need a spoonful or two more of milk. The dough should be sticky.
- Turn out onto a lightly floured board and knead gently for a brief 30 seconds. (Hint: count quickly to 30). Pat into a flat round about 1⅓in (3cm) thick. Don't be tempted to add more flour.
- Cut with a floured cutter pressing straight down and not twisting. Place on baking paper lined tray close together.
- Bake in the hottest part of the preheated oven. Bake for 12 – 15 minutes.
- Remove scones from the oven and wrap in a clean teatowel. This will keep them soft and tender.
Notes
-
To make Self Raising Flour
- In Australia to make self raising flour you will need 2 teaspoons of baking powder to each cup of plain flour.
- However in the United States, you will only need 1 1/4 teaspoons of baking powder per cup of plain (all purpose) flour.
- In other countries, please check your brand of baking powder.
- A pinch of salt is a large pinch around 1/8 of a teaspoon. Up to 1/4 of a teaspoon of standard fine table salt can be used if you prefer scones on the saltier side.
- 450 grams self raising flour (no self raising flour see below)
- pinch salt
- 60 grams butter
- 310mls milk plus extra if needed
- Preheat the oven to a very hot temperature – 450°F/230ºC
- Start with cold ingredients and keep everything cold.
- Grate the cold (even frozen) butter into the flour and rub in but leave little “pebbles” of butter for extra flakiness
- Add the cold milk all at once and mix quick with the blade of a dinner knife.
- Turn out on a VERY lightly floured board and knead briefly…by that I mean count quickly to 30 and stop.
- Resist adding more flour – this dough is meant to be sticky.
- Use a floured cutter and DON’T twist the cutter. Simply press down to cut. (Hint: use a floured glass if you don’t have a scone cutter)
- As soon as the scones come out of the oven wrap in a clean tea towel to retain the moisture.
- a spoonful of sugar.
- a handful of dried fruit.
- grated rind of an orange or lemon.
- a teaspoon of spice like cinnamon.
- chopped walnuts or other nut that you like.
- chocolate chips – white or dark.
- spoon the batter onto hot, stewed fruit and bake to make a delicious cobbler.
- cheese and herbs for a savory scone.
- sun dried tomato with olives and cheese.
- substitute gluten free flour for a gluten free scone.
Nutritional Estimate Per Serving
Nutritional Disclaimer
Nutritional information is an estimate provided by an online nutrition calculator. For accurate results, it is recommended that the nutritional information be calculated based on the ingredients and brands you use.


Can I replace the milk with buttermilk?
I’ve never tried that but I can’t see why not. Let me know how it goes.
Brilliant scones perfection at its best thanks my oven will not have time to go cold
Best ever
So glad you enjoyed the scones – definitely a favourite of mine!
This recipe has become a classic at home. I often add orange rims to the dough.
Fast enough to be quickly put together for breakfast or tea.
The orange zest sounds like a delicious addition!
Dear Marcellina,
This the best recipe indeed!
My English husband loves it. Thank you! ????
Izabela, I am so happy to hear that! 🙂
Hi sorry
I just messaged about the self raising flour amount and I was actually thinking about plain when I wrote that, one cup of self raising is 113g. So for your recipe are you saying it’s 450g? Sorry to pester just want to be sure.
Thankyou
Hi Stacey, sorry for the late reply. Yes, with this recipe, I used Australian cups which means each cup is a little bigger. So 1 cup equals 150grams of flour. I haven’t change the measurement because if you use cup measurement – stick to all cups for all the ingredients. If you use metric – use metric for all the ingredients. Don’t mix them up and it won’t make a difference to the end result.
This is such a wonderful recipe, if you follow my tips, you will have success. Don’t get to hung up on the quantities. Just be sure to have a sticky dough (it must never be dry, in fact you may need a touch more milk if your climate is dry) and only work it for 30 seconds as I have specified. Pat the dough out but not too thin and use a hot oven.
I do hope you enjoy these scones. I make them regularly and have done so for years. Please don’t feel like you are pestering – I love to help and am happy to answer any questions. Unfortunately, the time difference meant I was at work so couldn’t answer right away.
Let me know how you go.
Hi, I’m just wondering how in your notes section you’ve put if you don’t use cups 450g flour, but I thought a cup of flour was 120 so would be 360 in total? I just thought I’d double check before I made them?
I’ve been searching for a great scone recipe for years. I’ve looked through cookbooks, googled online, and scrolled through Pinterest, testing out recipe after recipe only to find they are either too dry, too wet, they don’t rise enough, they aren’t flakey enough, and so forth. While traveling, I’ve tasted some amazing scones, but have never been able to replicate them back home in the kitchen… until, that is, I came across your recipe for the Best Scones! They really are the perfect combination of flakey, tender, tall, and sturdy enough to top with lots of jam.
I’ve tried a couple of the variations, and so far my favorite is a spoonful of sugar mixed with lemon zest. Yum! I’ve even tried making these with canned coconut milk instead of cream, and I can’t even tell the difference! Thank you for sharing this simple yet wonderful recipe.
Hello Alyssa! Thank you so much for your detailed comment. I am very happy to hear that I have been able to help you out in your quest for a great scone recipe. This is exactly how I felt when I first came across this recipe many years ago. Happy baking xx
We loved this. And went for the option of adding a spoon of sugar .
Just a spoonful of sugar is all you need – perfect!
Great turn out when I’ve made them, the only thing is that the flour weight is off (at least in North America). 3 cups of a.p. flour is 360g. I put 3 3/4 tsp baking powder in my bowl then (about 17g) then add enough flour to get to 360g.
Hi Ali, I’m so glad the scones turned out for you! I have just reweighed the flour with the 250ml cup I use and the way I fill the cup for this particular recipe. It is definitely 450g for 3 cups of a.p. flour. I think these scones are quite forgiving and maybe you didn’t add all the milk. Fo anyone reading this comment, if you do add all the milk, I would think that the scones would take longer to cook if you didn’t use my ratios. Thanks for letting me know, Ali xx
Want to make cheese scones what’s the amount of cheese I need please.
I would add between 2/3 to 1 cup of grated tasty cheese to the flour mixture just before adding the milk. Also, maybe increase the salt to 1/2 teaspoon. Yummy with lots of butter!
I have always used this same recipe I don’t know where I come by it maybe my grandma’s. I recently added ginger syrup (I’m a queenslander)they turned out great. I great recipe always successful.
Yum, the ginger syrup is a great variation! I’ve been using this recipe for as long as I remember and yes, I agree, Helen – always successful. Thanks for stopping by.
easy and very successful, once I had the mixture all together I halved it and made half plain and added Cheese to the other half, had cheese scones with ham and tomato for lunch and plain with jam and cream for afternoon tea. I will recipe again.
So glad you liked the recipe, Sharon! Fantastic idea to split the mixture and make half savoury and half sweet!
Delicious. I halved the recipe and used almond milk.
I’m so glad to know that it works just as well with almond milk, Tonya! I’ve never tried that. Thanks for letting me know xx
I’m also a Queenslander who bakes but just wanted to point out scones originated in the UK not Australia and a real Devonshire cream tea is eaten in Devonshire with clotted cream.
Hi Suze! Thank you for visiting Marcellina in Cucina! I love hearing from a baker who is so interested in food and I hope you get a chance to try my scone recipe.
Can I add mashed pumpkin to this mix, if so how much?
Hello Mary! I probably would be more inclined to use my Pumpkin Scones recipe which you can find here… https://www.marcellinaincucina.com/pumpkin-scones-mascarpone-cream/
Be sure to have well drained pumpkin otherwise the mixture will be too wet. If you find the pumpkin is quite wet, don’t add all of the milk at once. Reserve a little. It can always be added if you think you need it. Happy baking!
Thank you Marcellina! I will definitely try them!
You’re welcome, Mary xx
This looks perfect for my daughter’s first birthday tea party! How would you store them if you wanted to make them for a party that was not the same day? I’d love to make them the day before if possible. Thanks in advance!
Hi Heather, thanks for your kind comment! Scones are really best made and eaten on the day of baking. These scones will be ok if stored in an airtight container but not as good as freshly baked. If you freeze them, you could defrost them the next day and warm them in the oven, wrapped in foil. Just for maybe 5-8 minutes at 180c/350F. These are so easy though that you really could make them the morning of the party. Serve with lots of fruity jam and freshly whipped cream! Enjoy your daughter’s party! xx
Haven’t tried this recipe yet but i see there is no egg in the recipe. Is this correct?
Thanks
Hi Sonia, yes that’s correct. There is no egg in this recipe. I think you will like the results. xx
Hello! I’m wanting to try and make these tomorrow and I want to flavour them with lemon. Can I infuse lemon juice into the mixture instead of the zest? I making them for my daughter and she is quite picky and doesn’t enjoy the texture of zest in her food. Is there any other option or do I have to include the zest in order to flavour them? The recipe looks great so I don’t want to mess it up 🙂
Hi Kassie! You could use a little lemon juice. If you add it to the milk, the milk with curdle and be like buttermilk which isn’t a bad thing. However I’m not sure you’d get a lot of lemon flavour. What about using some good lemon extract instead? That’s what I would do. Let me know how it goes. xx
Can i put the flour and butter in a food processor to combine or is it best to do it by hand?
I have never put the flour and butter in the food processor but I can’t see why not. Be sure to only pulse and not overprocess the mixture. Stop when the mixture looks like sand. I would not recommend adding the milk in the food processor though. The food processor would overprocess the scone mixture. Let me know how it goes. Thanks for dropping by!
This is the first time I’ve ever made scones that rise! I’ve been trying for years. Thank you. This recipe really works for me. Made some date ones and plain. Your tips are what I’ve needed all this time.
Hi Clare, I’m so happy that you have succeeded!! Thanks for the feedback! Personally I absolutely adore date scones. Baci, Marcellina xx
Can I prepare the dough and leave it until tomorrow in the fridge? I want them to be fresh but I don’t have time to do it tomorrow morning?
Hi Chanàl! I don’t recommend preparing scones ahead of time because they won’t rise as well. Baking powder (in the self riding flour) is activated firstly by the addition of liquid and then by heat. However you can rub in the butter the night before, leave that flour/butter mixture in the refrigerator overnight then add the milk in the morning and proceed with the recipe. Hope this helps. xx
Easiest and most delicious scone that can be prepared in half an hour. Very impressed.
These really are, Katrina!
Quick, easy, simple and the best ! I would also serve these beauties with strawberry jam 🙂 Grazie milla !