English Scones Recipe
This is the best English Scones Recipe I have ever tried and I want to share it with you.
With this recipe you can make light and fluffy scones every time!

Table of Contents
Why you’ll love this recipe
If you want a baking recipe with tips and hints, you’ll find lots here on Marcellina in Cucina. There’s recipes for a quick chocolate cake, an easy vanilla cake or AMAZING chocolate chip cookies and exactly how to make biscotti. And here you’ll find the best English scones recipe with all my tips for success.
Scones are such a classic Australian treat. Everyone loves them. Whether you like you scones with strawberry jam and cream or with honey or just dipped into your tea. A light, tender scone is always appreciated and enjoyed by everyone.
Quite a few years ago I visited Tasmania and enjoyed Devonshire Tea every afternoon. I marveled at the bakers in the tea houses who made fresh, delicious scones all day, every day. I wanted to make great English scones too!
Then I found this English scones recipe and copied it by hand into my little red recipe book. Now I want to share with you what I have discovered.
Ingredient notes
I’ve tried lots of different easy scones recipes. From recipes with lemonade and cream to recipes containing eggs but I have found this very basic recipe is the best English Scones Recipe ever! Why? Because it is light and fluffy, quick to make and never fails. The best part is that the ingredients are pantry staples.
- self raising flour
- salt
- butter
- milk
Variations
This is a basic English scones recipe. A soft and easy scones recipe but a basic one which means you can add extra flavorings that you may like.
- a spoonful of sugar.
- a handful of dried fruit.
- grated rind of an orange or lemon.
- a teaspoon of spice like cinnamon.
- chopped walnuts or other nut that you like.
- chocolate chips – white or dark.
- spoon the batter onto hot, stewed fruit and bake to make a delicious cobbler.
- cheese and herbs for a savory scone.
- sun dried tomato with olives and cheese.
- substitute gluten free flour for a gluten free scone.
Instructions
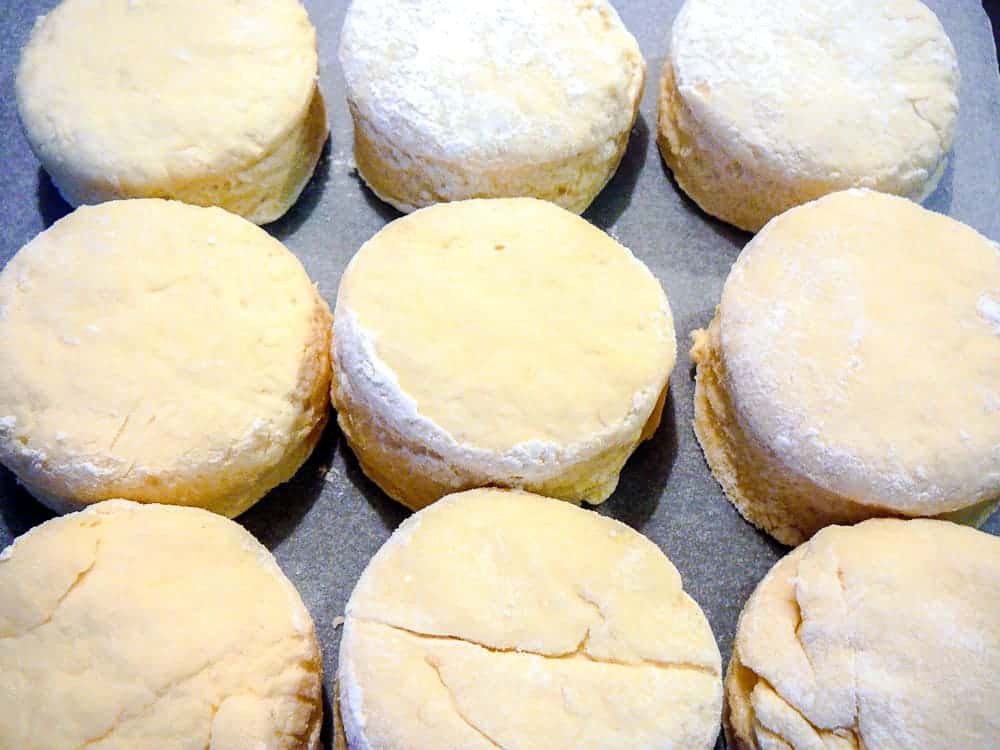
- Preheat the oven
- Rub the cold butter into the flour and salt
- Add the cold milk all at once
- Combine into a dough and pat out onto floured board
- Cut out scones
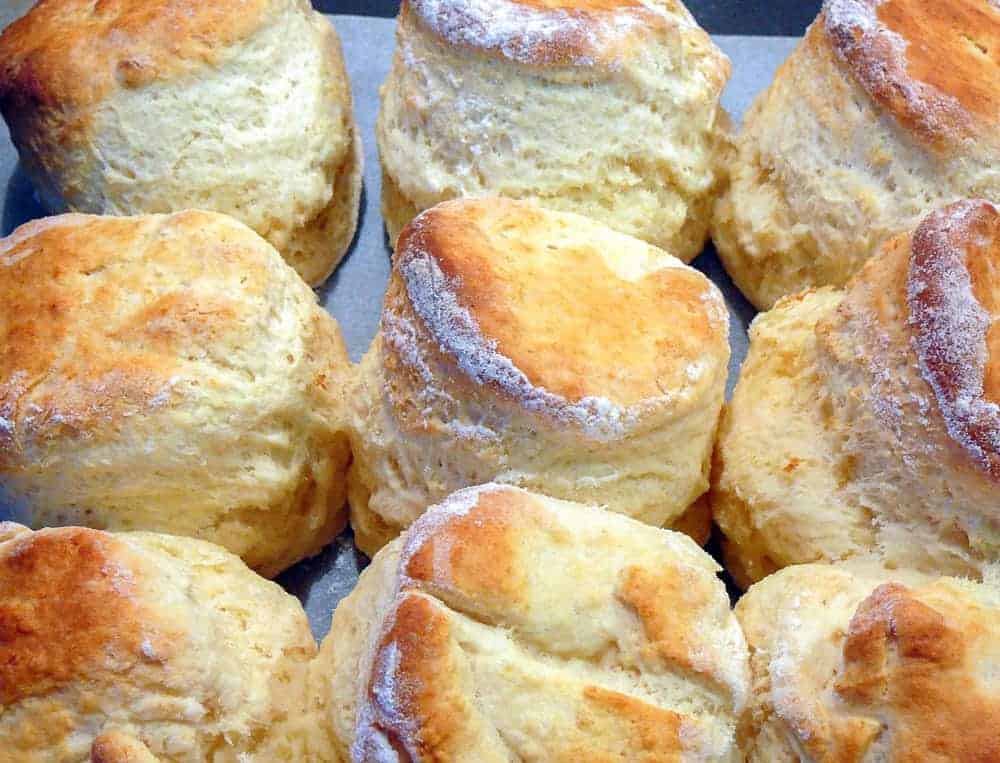
- Place on baking sheet and bake in a hot oven
Tips for success
Really, it’s quite simple. Here are the 8 secrets I have learnt over the years to make great English scones.
- Preheat the oven to a very hot temperature – 230°C/450°F
- Start with cold ingredients and keep everything cold.
- Grate the cold (even frozen) butter into the flour and rub in but leave little “pebbles” of butter for extra flakiness
- Add the cold milk all at once and mix quick with the blade of a dinner knife.
- Turn out on a VERY lightly floured board and knead briefly…by that I mean count quickly to 30 and stop.
- Resist adding more flour – this dough is meant to be sticky.
- Use a floured cutter and DON’T twist the cutter. Simply press down to cut. (Hint: use a floured glass if you don’t have a scone cutter)
- As soon as the scones come out of the oven wrap in a clean tea towel to retain the moisture.
FAQ’s
As with any scones, it is really best if they are eat warm from the oven. And, I mean, who could resist that? But, even though this is the best English scones recipe ever, you may have a few left over.
You can keep the scones in air tight container for the next day but warm in the microwave before splitting and topping with jam and cream.
However, it is best to FREEZE any leftover scones so that they don’t dry out. I like to wrap each one individually in plastic wrap then pop all of them into a zip lock bag.
To defrost, simply remove the plastic wrap and defrost for 20 seconds in the microwave, turning over halfway through. Is it like a fresh scone? No, nothing beats a freshly baked scones but at a pinch, I think it’s fine.
You can make your own quite easily! It takes just two ingredients – plain or all purpose flour and baking powder. Just remember that different brands of baking powder perform differently. So it is adviseable to check the instruction on the box of baking powder you are using.
In Australia to make self raising flour you will need 2 teaspoons of baking powder to each cup of plain flour. However in the United States, you will only need 1 1/4 teaspoons of baking powder per cup of plain (all purpose) flour. In other countries, please check your brand of baking powder.
Serving suggestions
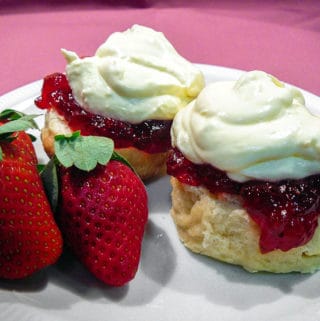
These English Scones should be eaten warm from the oven. Split the scone in half and you can melt butter onto the scone before slathering on some lovely, thick jam.
I’m a classic girl and love eating scones with my strawberry jam recipe (you really should try it) and fresh cream. However the list is endless. Any spread is good on English scones – honey, golden syrup, maple syrup or even just really good butter. Little people love chocolate spread on their scones.
More recipes
Damper with olives, sun dried tomatoes and cheese
Pumpkin Scones
Mascarpone Cream
What readers are saying
“This is the first time I’ve ever made scones that rise! I’ve been trying for years. Thank you. This recipe really works for me. Made some date ones and plain. Your tips are what I’ve needed all this time.”
“Easiest and most delicious scone that can be prepared in half an hour. Very impressed.”
Made this recipe?
Let me know if you liked it by leaving a ★★★★★ star rating and a review below. Don’t forget to subscribe to my newsletter – it’s free!
English Scones
Ingredients
- 3 cups self raising flour See note 1
- pinch standard fine table salt See note 2
- 2 ounces (4 tablespoons or 60grams) salted butter
- 1 ¼ cups milk plus extra to brush scones before baking
Instructions
- Heat the oven to 450°F/230ºC.
- Measure the flour by first giving it a stir to lighten then spoon the flour into measuring cups.
- Sift flour and salt into a bowl and rub in the butter until the mixture resembles fine breadcrumbs. It's if some of the butter is not completely rubbed in. Leave little pebbles of butter.
- Stir in the milk with a flat bladed knife. Depending on the weather and your flour you may need a spoonful or two more of milk. The dough should be sticky.
- Turn out onto a lightly floured board and knead gently for a brief 30 seconds. (Hint: count quickly to 30). Pat into a flat round about 1⅓in (3cm) thick. Don't be tempted to add more flour.
- Cut with a floured cutter pressing straight down and not twisting. Place on baking paper lined tray close together.
- Bake in the hottest part of the preheated oven. Bake for 12 – 15 minutes.
- Remove scones from the oven and wrap in a clean teatowel. This will keep them soft and tender.
Notes
-
To make Self Raising Flour
- In Australia to make self raising flour you will need 2 teaspoons of baking powder to each cup of plain flour.
- However in the United States, you will only need 1 1/4 teaspoons of baking powder per cup of plain (all purpose) flour.
- In other countries, please check your brand of baking powder.
- A pinch of salt is a large pinch around 1/8 of a teaspoon. Up to 1/4 of a teaspoon of standard fine table salt can be used if you prefer scones on the saltier side.
- 450 grams self raising flour (no self raising flour see below)
- pinch salt
- 60 grams butter
- 310mls milk plus extra if needed
- Preheat the oven to a very hot temperature – 450°F/230ºC
- Start with cold ingredients and keep everything cold.
- Grate the cold (even frozen) butter into the flour and rub in but leave little “pebbles” of butter for extra flakiness
- Add the cold milk all at once and mix quick with the blade of a dinner knife.
- Turn out on a VERY lightly floured board and knead briefly…by that I mean count quickly to 30 and stop.
- Resist adding more flour – this dough is meant to be sticky.
- Use a floured cutter and DON’T twist the cutter. Simply press down to cut. (Hint: use a floured glass if you don’t have a scone cutter)
- As soon as the scones come out of the oven wrap in a clean tea towel to retain the moisture.
- a spoonful of sugar.
- a handful of dried fruit.
- grated rind of an orange or lemon.
- a teaspoon of spice like cinnamon.
- chopped walnuts or other nut that you like.
- chocolate chips – white or dark.
- spoon the batter onto hot, stewed fruit and bake to make a delicious cobbler.
- cheese and herbs for a savory scone.
- sun dried tomato with olives and cheese.
- substitute gluten free flour for a gluten free scone.
Nutritional Estimate Per Serving
Nutritional Disclaimer
Nutritional information is an estimate provided by an online nutrition calculator. For accurate results, it is recommended that the nutritional information be calculated based on the ingredients and brands you use.



These are great. So quick and easy and lovely light and fluffy
So yummmmy
Glad you love the recipe, Debbie! With this recipe I finally found the key to making amazing scones!
Easy and amazing! Nothing like heavy, dense, overly sweet bakery scones. These are light and just fantastic! So incredibly easy made in the food processor too. Cold butter is the key.
I’m thrilled that you loved these, Jill!
I just made these for lunch…with some additions.
Added another tsp of baking powder, 1 Tbsp of vinegar to the milk…(now it’s buttermilk) to make it flaky (doesn’t alter the taste, big tsp of mustard powder, tsp paprika, 1 medium onion finely chopped and 1 cup of grated cheese.
SMASHING.
Savory scones are so delicious!
I made these and they are amazing! Super easy ingredients and recipe! Thank you
So happy to hear that you love these scones as much as we do, Kristen!
Love these scones, I make them all the time and also make another batch adding chopped dates so delicious 😋
The addition of dates is great for these scones. These are a regular in our house. Hope they become a regular at your place too!
This is the recipe my father has been using for more than 70 years. His scones rise so high and are so light. The secret is he has cold hands. You want cold butter and cold hands. For us warmer people, cool your fingers as much as you can to get the rubbing in right. The trick is not overworking.
While using a food processor might seem like a good idea, it is only good if you use pulse and really quickly so as not to warm the butter too much, then tip it in the bowl to add the milk and mix with a knife.
I have watched my father for decades make scones. He does it all on the kitchen bench – no bowl – so that by the time the milk is combined with the flour/salt and butter, it’s just roll it out and cut. His roller was a 600ml glass milk bottle because it is light, and he would roll it out about 1 to 1.5cm thick. He gets an extraordinary rise. He used a floured small glass to cut them out; quick push and lift, no wriggling which pushes air out. A proper open cutter is better and we are less likely to twist it; just push and lift and flour it frequently.
I grease the tray and then flour it and arrange the scones close together before using milk wash. And there is nothing like homemade jam to eat them with. I am on my last jar of Apple and Quince jelly. It is an excellent scone companion.
I have found that SR flour can lose a bit of its rise if it’s getting old, so adding a little baking powder restores it to what it is supposed to be.
Robyn, that’s a lovely account of your dear father making scones and all the tips you’ve learnt from him over the years. Fingertips are quite cool and working quickly is the key to perfect scones. That apple and quince jelly sound delicious!
Hi there! I am beyond excited to bake these scones. I have some freeze dried strawberries on hand, and I was wondering if it would work to add them once they are ground up. Also, how much do you think you would add to your recipe if so?
Hi Michelle! I’m so glad you love scones as much as I do. It sounds really interesting to add ground, freeze dried strawberries though I have never done that myself. I think you would need at least 1 ounce or possible 1 1/2 ounces. I have checked cake recipes that used ground, freeze dried strawberries and they usually add a teaspoon of strawberry extract for the full strawberry flavor. I would also think that you may need to add a little more milk because I’d imagine the dried powder would draw moisture. Let me know how they turn out!
Hi Marcellina! My daughters and I are hosting a tea party today and tested this recipe last week. We were amazed that they taste so similar to our favorite tea room’s scones! Wondering if I could cut out the scones ahead of time and keep the dough covered & chilled in the fridge and then bake right before our guests arrive? What do you think?
Yes, you can do that. I’ve done that before and there’s minimal difference. The baking powder will already have been set in motion but usually baking powder is double action which means it has a second activation on heating (eg in the oven) so it will still get the rise. The cooking time will increase a smidge because the dough is cold.
Marcelina Hi,
This is the way my Mum taught me to make scones, when I was 10 years old, I’m pushing 76 now. Though I would add a bit more butter. We never made small amounts of scones, & we put all the dough on the floured tray & patted it gently out to 1” thick with our fingers, then scored it with a knife into squares.
They are best strait from the oven buttered with slices of cold lamb. Great Sunday night supper. Country Aussie cooking.
Hi Patricia! What a wonderful scone story! Thank you for sharing it with me! It took me quite a while to learn how to make scones but now I love to make them regularly and my family adore them. Too true – great Aussie cooking!
Wow! Big beautiful scones came out of my oven brilliant ????
Yay! So happy you loved these as much as I do!! Not a lot beats a great scone, I think!
Check your conversion – I made these and they came out pretty dry; I thought 3 tablespoons of butter didn’t seem like very much but followed the recipe. Later looked up conversion of 60g butter to tablespoons and found sources stating 4 1/4 to 4.8 tablespoons, or 1/4 cup …that would make a big difference!
Hello Deena, I’m sorry your scones came out dry. These scones are tested by many readers who have only provided great feedback and I value your feedback too. You are right, 2 oz is 4 tablespoons of butter. However, the butter is not what makes these scones so light and fluffy, it’s actually the ratio of flour to milk. Please check that you have measured the flour correctly and add more milk if the scone dough isn’t sticky. Hope these tips help!
Thanks for correcting the recipe Marcelina. I’ll try them again!
You’re welcome, Deena! Be sure to not add too much flour. I think you’ll enjoy them. Thank you!
Just made these scones
I added some sultanas, oh my they are delicious
Sultanas are a great addition!
They turned out well so quick and easy to make. Wasn’t sweet enough for me so I’ll add some sugar next time.
Thanks for your feedback, Emma! Certainly you could add more sugar to your taste. I love sconces with lashings of jam so these are just right for me! Enjoy your homemade scones xx
I want to make this a savory cheese and herb scone by adding smoked cheddar, rosemary, and sage. How much of each should I add? Thank you
You could add as much as a 1 1/2 cups of grated smoked cheddar to the recipe. As for the herbs, perhaps 1/2 teaspoon of each if dried or 1 teaspoon of finely chopped fresh herbs. Sounds delish!
I found the mixture very sticking and I couldn’t get it out the mixing bowl it was just a floppy blob, why would that happen please
Hello Cheryl! This is a sticky dough and it will need to be scraped out of the bowl. It sounds to me that you’ve done exactly the right thing and the dough is the right consistency. The stickiness of the dough is why these scones are so moist and delicious. Hope that helps.
Hi Marcellina. I made these scones a couple of weeks ago to my guests. They loved them. I have to say they were the best scones I’ve ever made. Thank you for the recipe. ????
Regards
Ivana
Hello Ivana! It makes me so happy to hear that you and your guests loved these scones as much as my family and I do! xx